How to setup a Raspberry Pi without a screen and keyboard
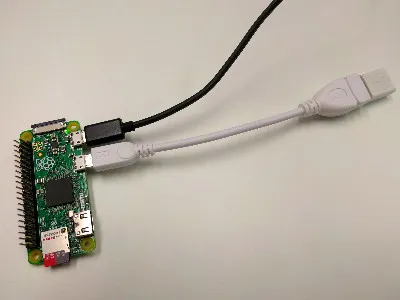
So I have a raspberry pi zero and I don’t have a mini HDMI connector or usb keyboard right now and I want to play with it. I also only have access to WIFI and luckily I have a Raspberry PI WIFI USB adaptor. So this is how you can set it up as a headless linux box without a screen and keyboard.
Update 2 - It got even easier now.
- Get the Raspberry Pi Imager at https://www.raspberrypi.org/software/
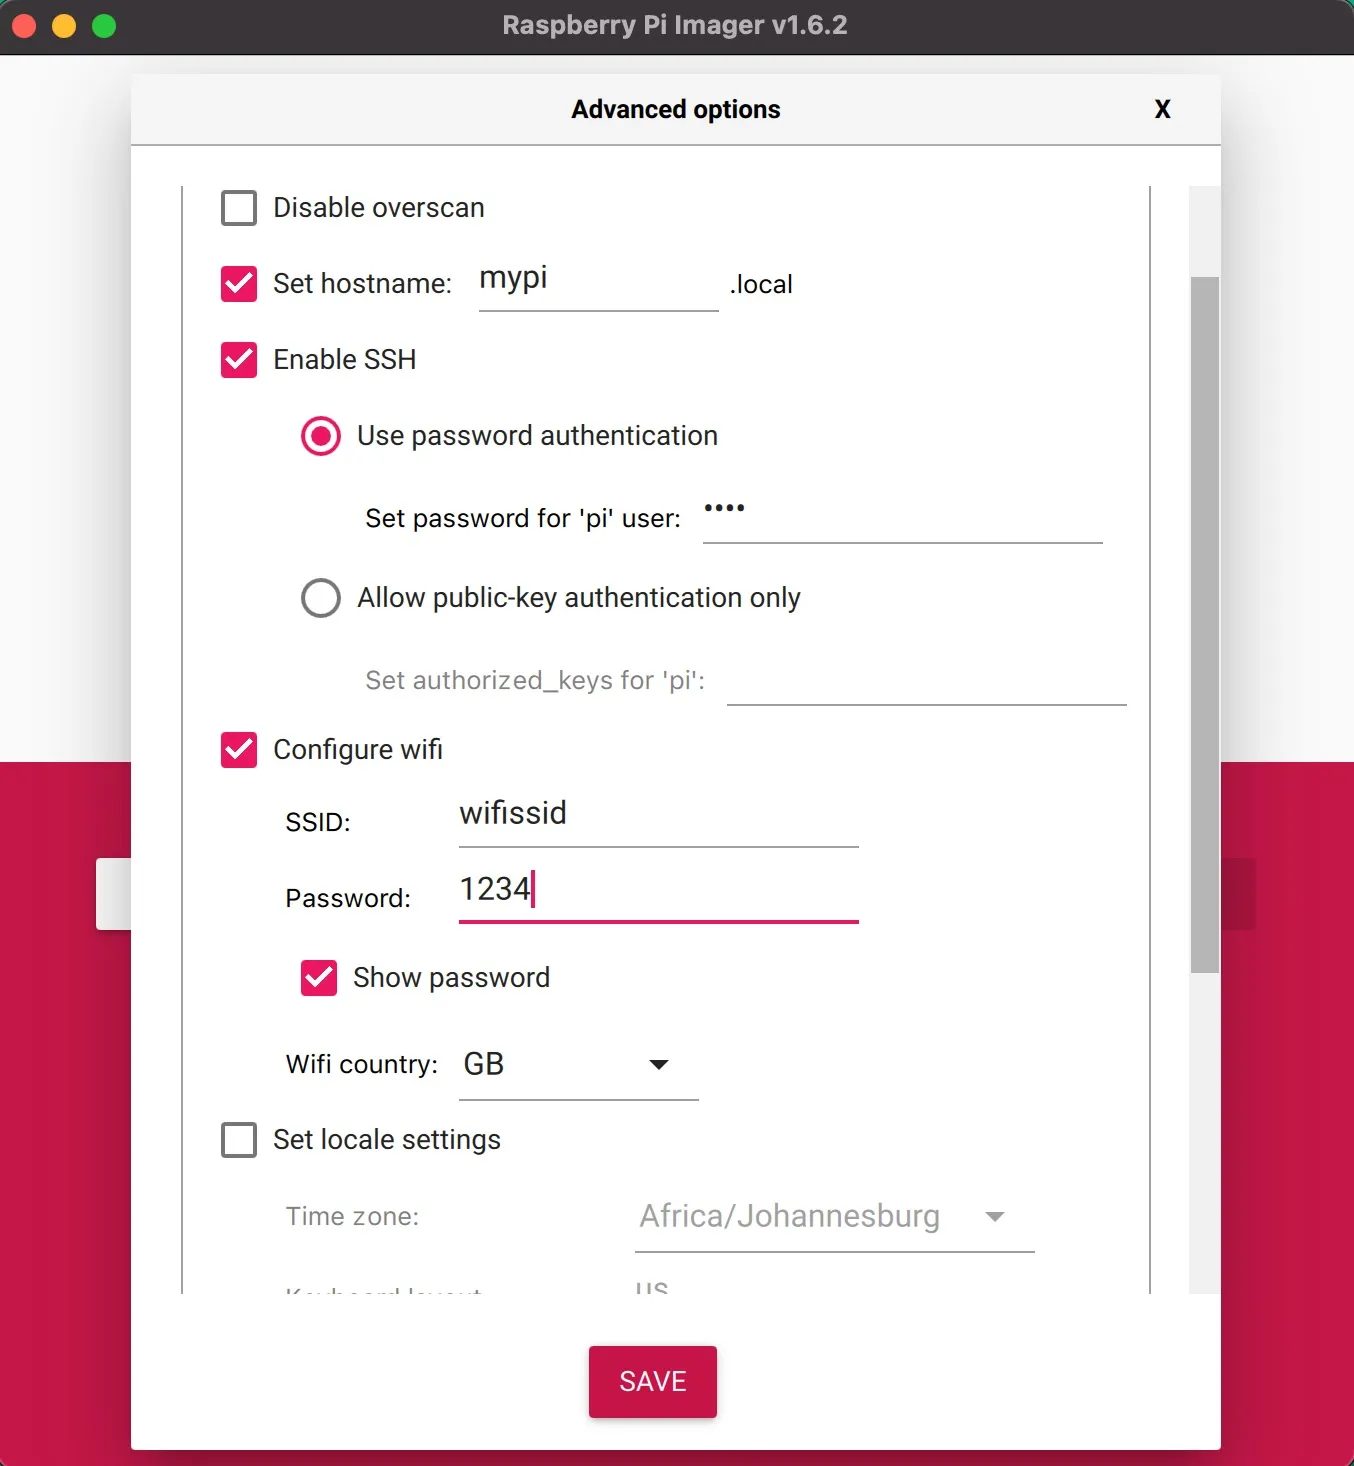
- Open up the Raspberry Pi Imager and hit “Ctrl-Shift-X” for the advanced options.
- Now you can change your hostname, add your WIFI credentials, enable ssh and even set you locale. This makes life so much easier.
- Write to the SD card and you ready to plug it into the pi and use as normal.
Update - Ignore the original post below and see the ‘New Steps’ it’s so much easier now.
New Steps:
- Download Raspbian from raspberry pi downloads
- Use https://etcher.io/ (much more stable now) to write the image to your SD card
- Remove the SD card and plug it back into your computer and see if you see it mounted as boot
- Now add a file called ssh (with no extension) to enable ssh access. Then add a wpa_supplicant.conf file with your WIFI network security details. Here is what it looks like on my machine (using terminal).
touch /Volumes/boot/sshtouch /Volumes/boot/wpa_supplicant.confAdd the following to the wpa_supplicant.conf file:
ctrl_interface=DIR=/var/run/wpa_supplicant GROUP=netdev

network={
ssid="myssid"
psk="mywifipassword"
key_mgmt=WPA-PSK
}- Now put the SD card into the pi and boot, find the pi on your network (my case 192.168.0.151)
- Now you can ssh into the pi in your terminal
ssh pi@192.168.0.151, password israspberry
Original post:
This is a Mac guide by the way.
I went through a whole bunch of guides on the web which didn’t work and spent a lot of time trying to mount the ext4 partition of the SD card on the mac but could only get it to mount as read only which doesn’t help me.
Here is a mismatch of the advice and methods that worked for me (might be overkill but it worked). For this tutorial you need linux VM on VirtualBox (I had an Ubuntu VM already going).
Steps:
- Download Raspbian from raspberry pi downloads
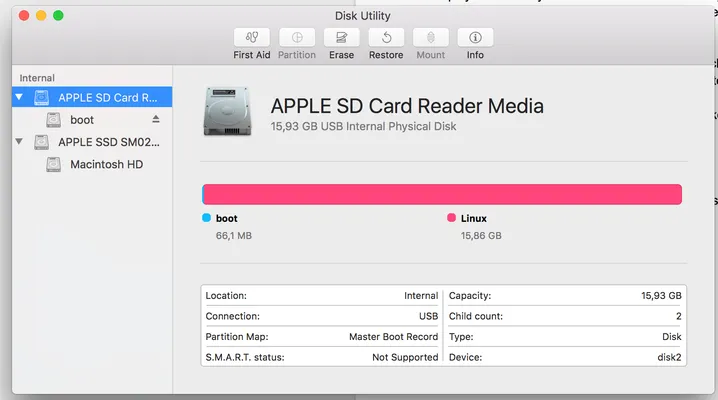
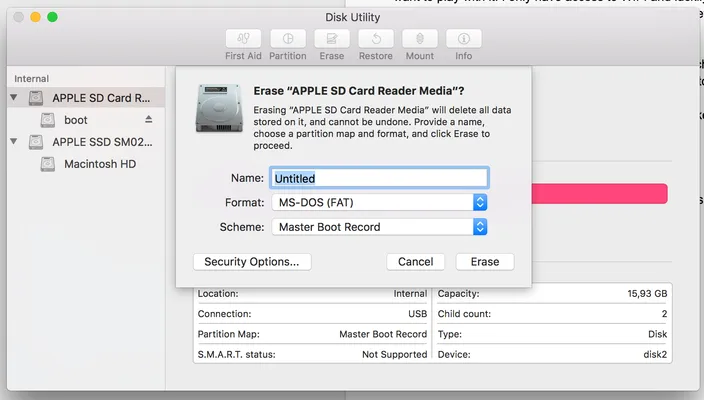
- Use disk utility to format your SD card to FAT32 like in the pictures below.
- Now write the Raspbian image to the SD card. I have used the methods on the raspberry pi website (format methods), but I found an easier method on Hacker News the other day https://etcher.io/. It works well, but I had an issue downloading the dmg from the site, so I just pulled the source and build it manually (totally overboard I know). Here are the steps in case you have the same problem.
git clone https://github.com/resin-io/etcher

cd etcher

brew install afsctool

scripts/build/darwin.sh install

npm start
Choose the Raspbian image and write it to your SD card

- Now we use the linux VM to mount the SD card and add the WIFI password manually (you need VirtualBox and a linux VM running for this step). Open up your terminal and do the following:
diskutil list, to give you a list of drives, so you can find your SD card, mine was /dev/disk2, then make sure you have the SD card unmounted (you can check in Disk Utility ordiskutil unmountDisk /dev/disk2)- To access the virtual disk from virtual box we need to give it permissions. It’s just temporary so I’m giving everyone full access.
sudo chmod 777 /dev/disk2 sudo VBoxManage internalcommands createrawvmdk -filename sd1.vmdk -rawdisk /dev/disk2, and replace /dev/disk2 with your SD card and sd1.vmdk with a name you want. sd1.vmdk will be the virtual disk you mount in the linux box.- Give the virtual disk open permissions too (this is only way I got it to work)
sudo chmod 777 sd1.vmdk - Unmount the SD card in disk utility or in the terminal with
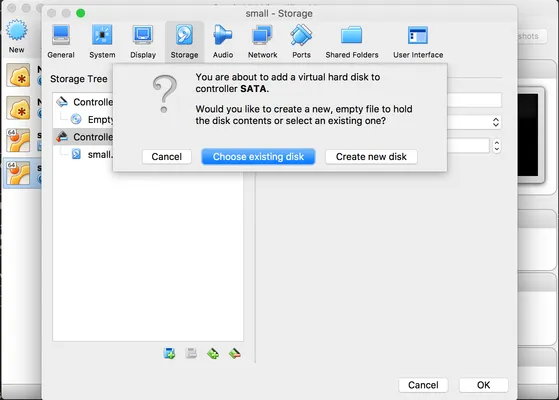
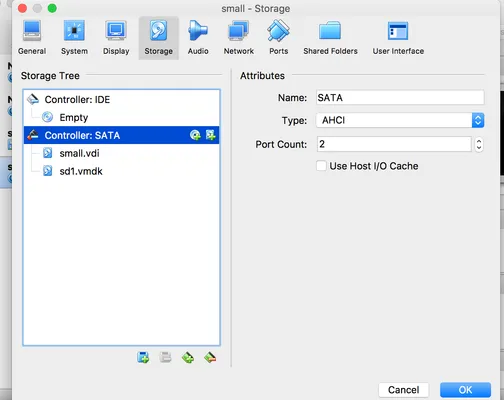
diskutil unmountDisk /dev/disk2 - Now open virtual box and mount the sd1.vmdk as a SATA drive. Then start up the linux VM and login.
- In the linux VM, type
sudo fdisk -lto find the drive (look for the size of the SD card to find it), mine was/dev/sdb - In the linux VM, type
mkdir sd1to create a mount folder for the SD card. - In the linux VM, type
sudo mount /dev/sdb2to mount the linux partition of the SD card (sdb2). - In the linux VM, type
sudo nano sd1/etc/wpa_supplicant/wpa_supplicant.confto add the WIFI details to the file (I over wrote the other stuff in the file):
network={
ssid="myssid"
psk="mywifipassword"
}-
In the linux VM, type
sudo umount sd1to un mount SD card -
Now close the VM and put the SD card into the pi and boot it up to see if it connects correctly.
-
I used an ip scanner to figure out what the ip address of the pi was. In my case is was 192.168.0.151 (FYI takes a while to boot up and connect).
-
Now you can ssh into the pi in your terminal
ssh pi@192.168.0.151, password israspberry -
Check if you can access the internet, download google.com page
wget http://google.com

Now do something cool with the pi!