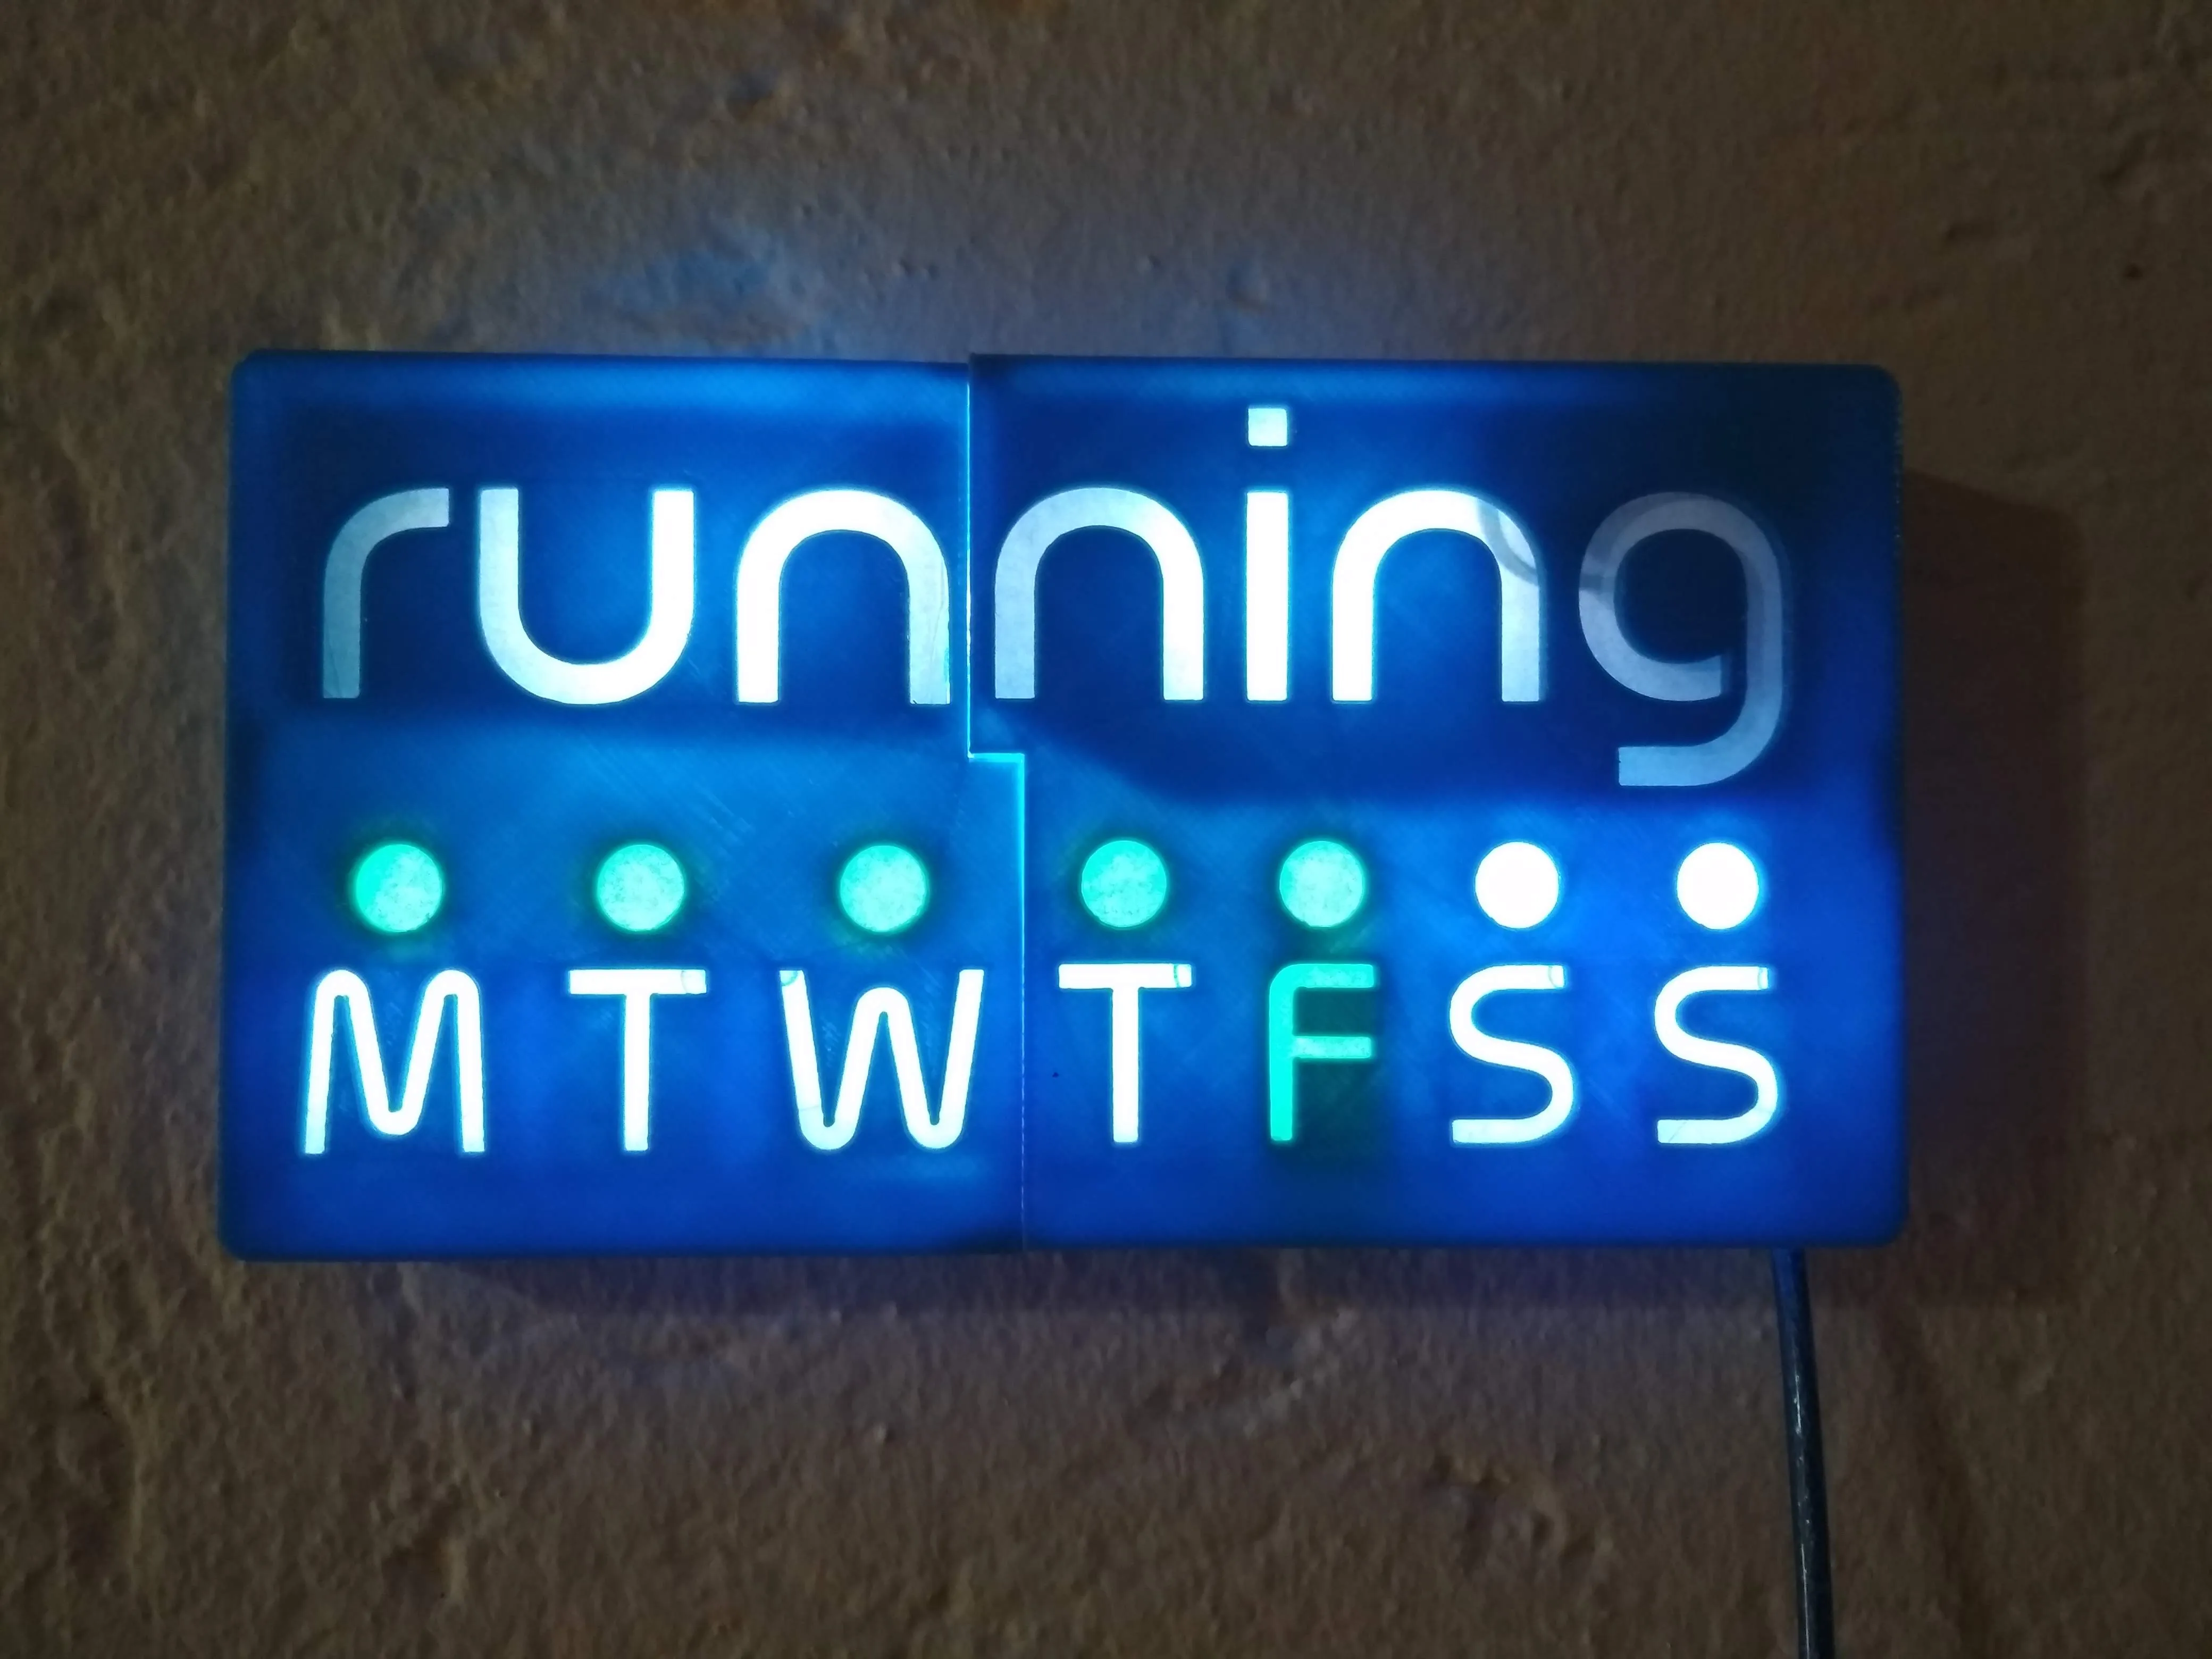
Running IoT Display
I saw a contest from Microsoft about IoT and serverless functions, so I thought yay some buzz words together I should try this (contest link). I didn’t feature in the contest but happy with what I now have hanging on my wall.
If you managed to get to this blog you know I enjoy running. However I do have a problem with consistency where sometimes I go a week or two without getting out on the road. So I thought I could make a display that is loud and in my face about the days I run and don’t run. I didn’t want an app throwing me notifications or emails because I don’t want more of that noise and I needed something cool for the competition.
So this post is a build log of roughly what I did and how. It might help if you doing something similar (I didn’t take screenshots of every step).
Grab the code github link
Idea
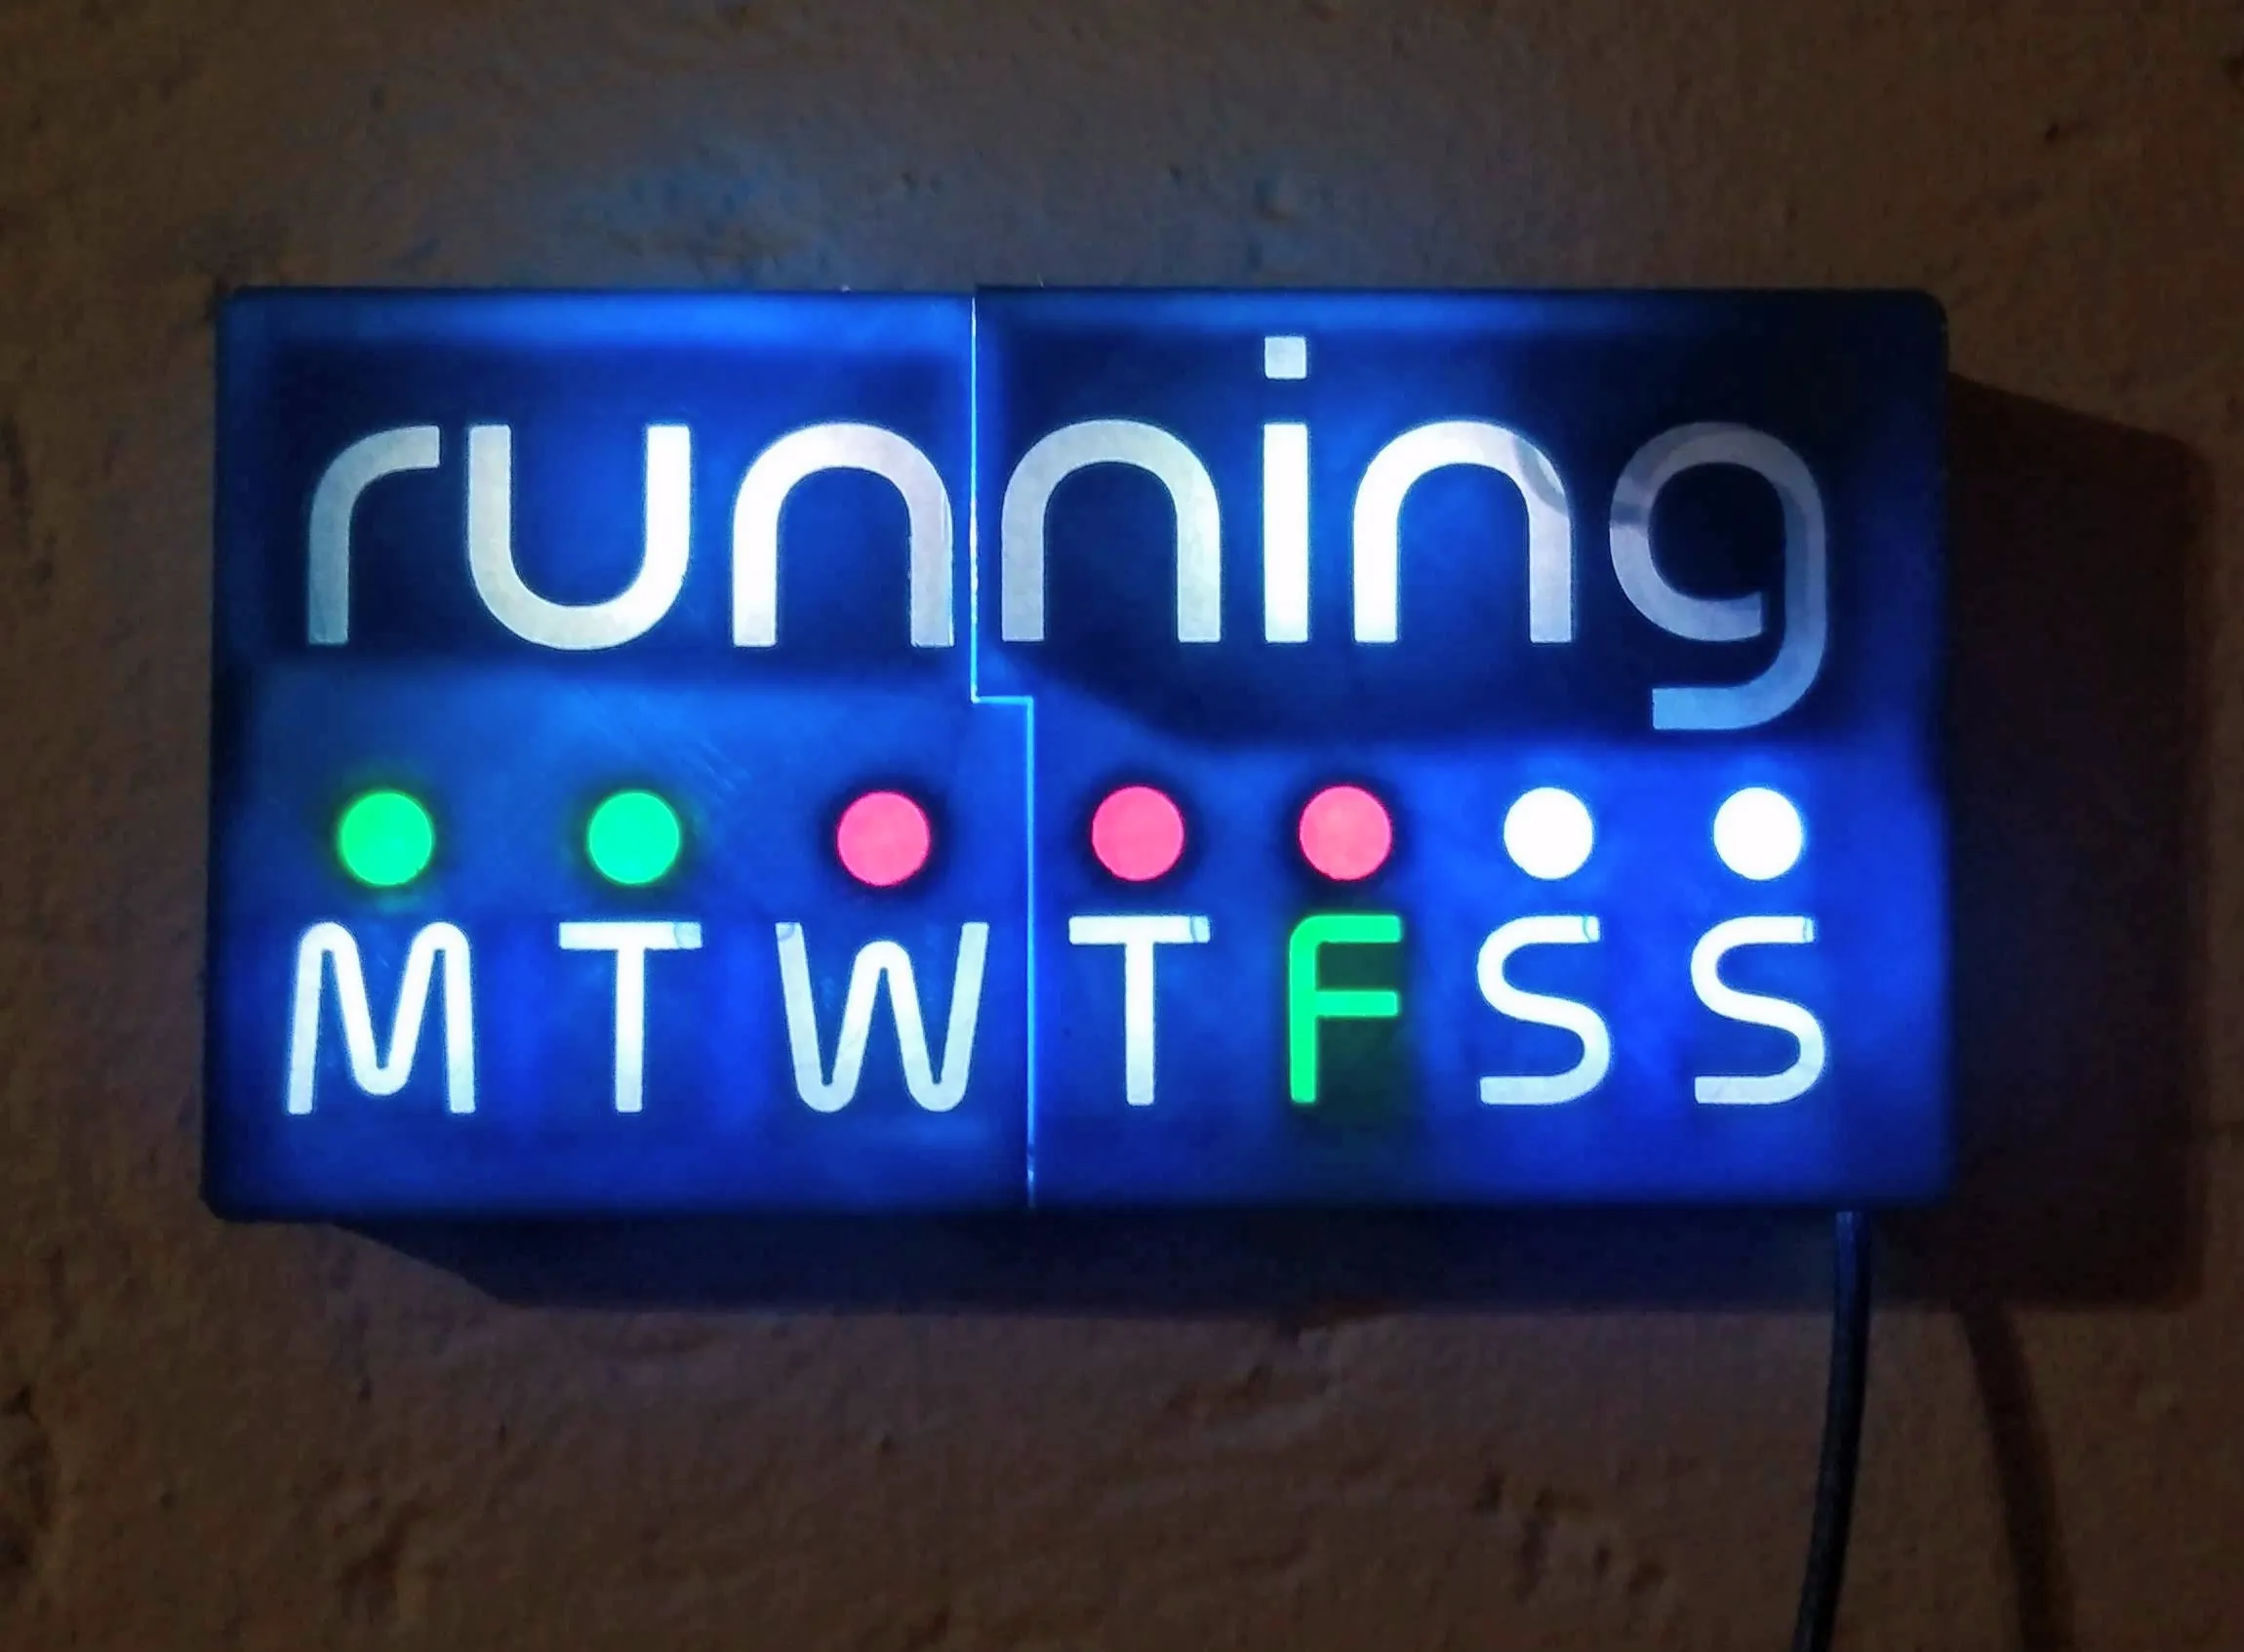
I wanted to 3d print a display that I could hang on the wall with cutouts for days of the week. Behind which I could put LEDs to show which days I made it out on a run. I could use a serverless function to ping the Strava API every few hours to get the running I’ve done on the day. I would then send the LED display values down to a display via mqtt.
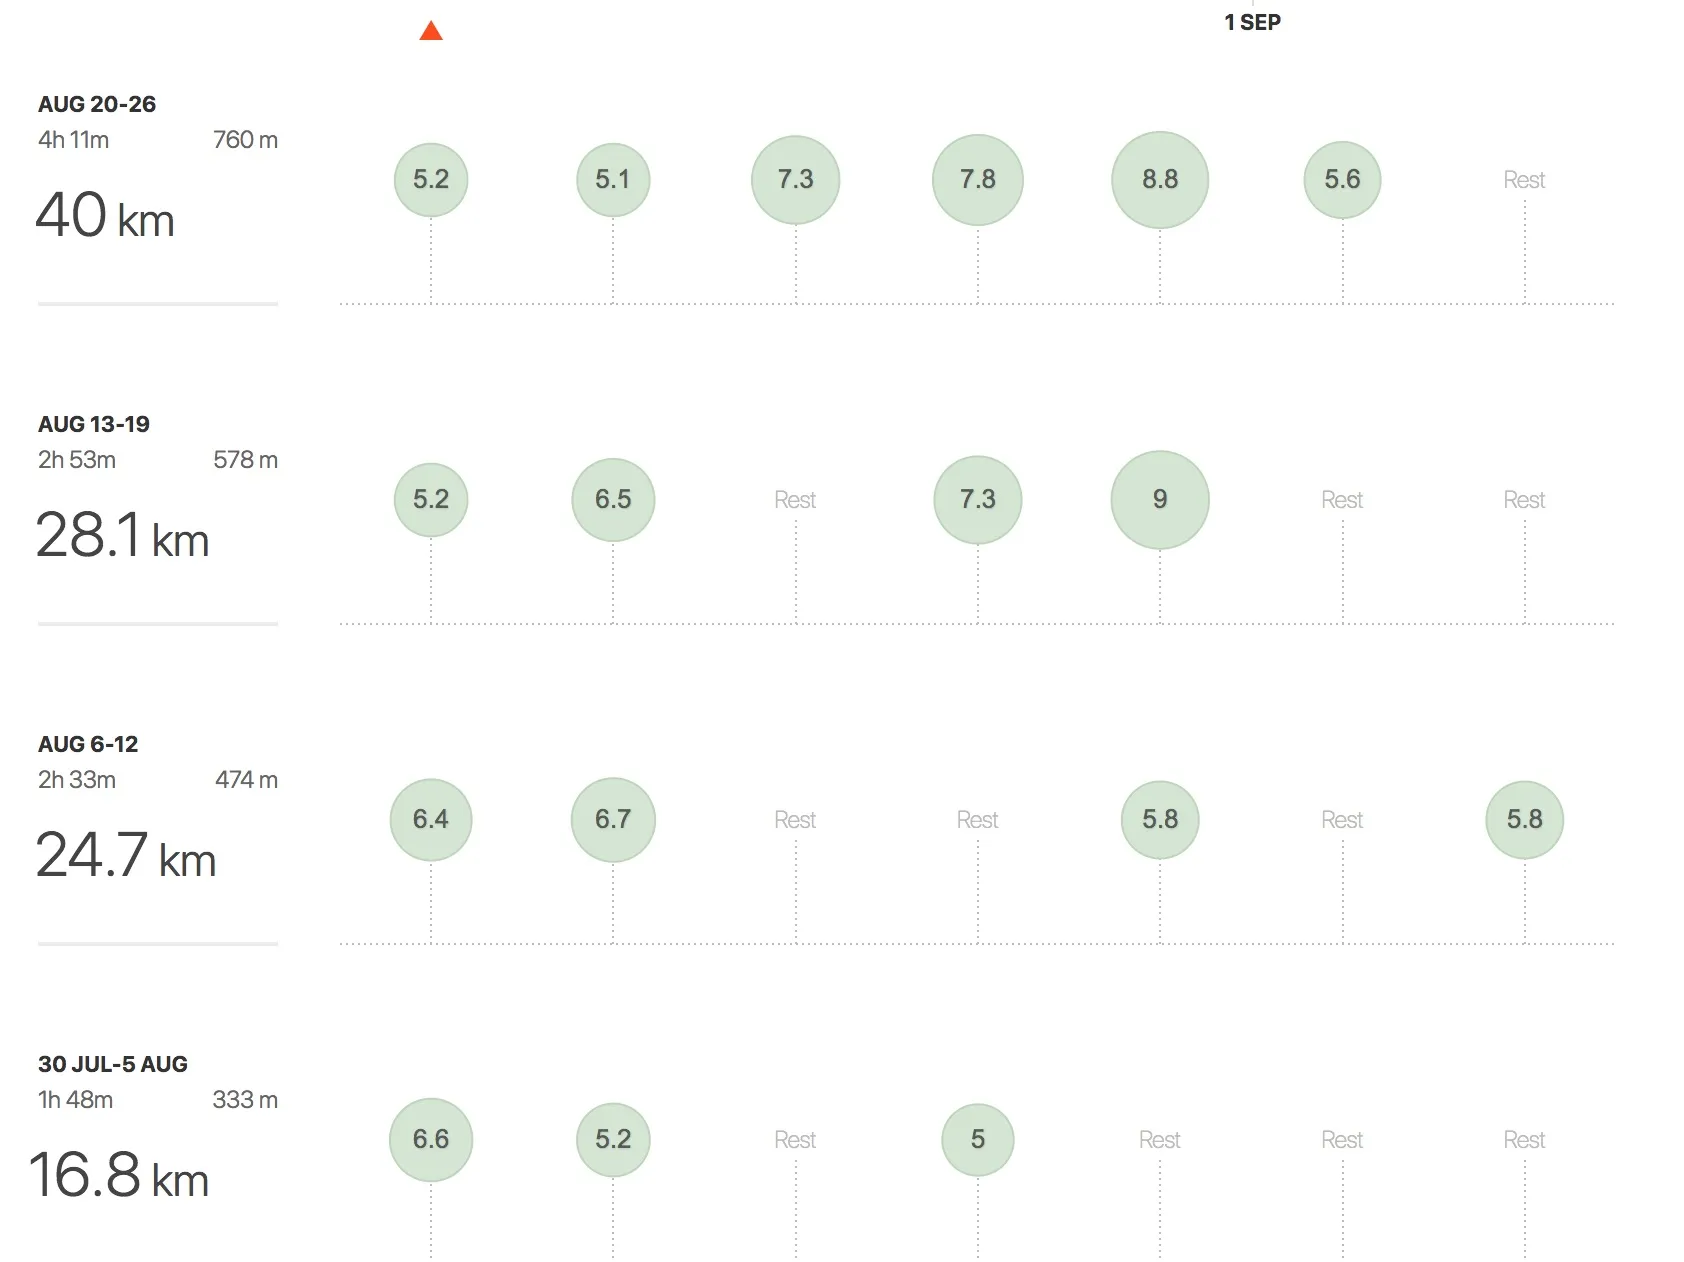
Getting Strava running data
I log all my running with a Suunto GPS watch and then it syncs with my phone and goes up to Strava. I thought about getting the data from Suunto but they don’t have an api that is easily accessible. Strava however has a nice api and all you need to do is create and app to get an api key (its free). Check out the Strava API and there is also a nice npm package to make it even easier to get the data out (package).
Hardware
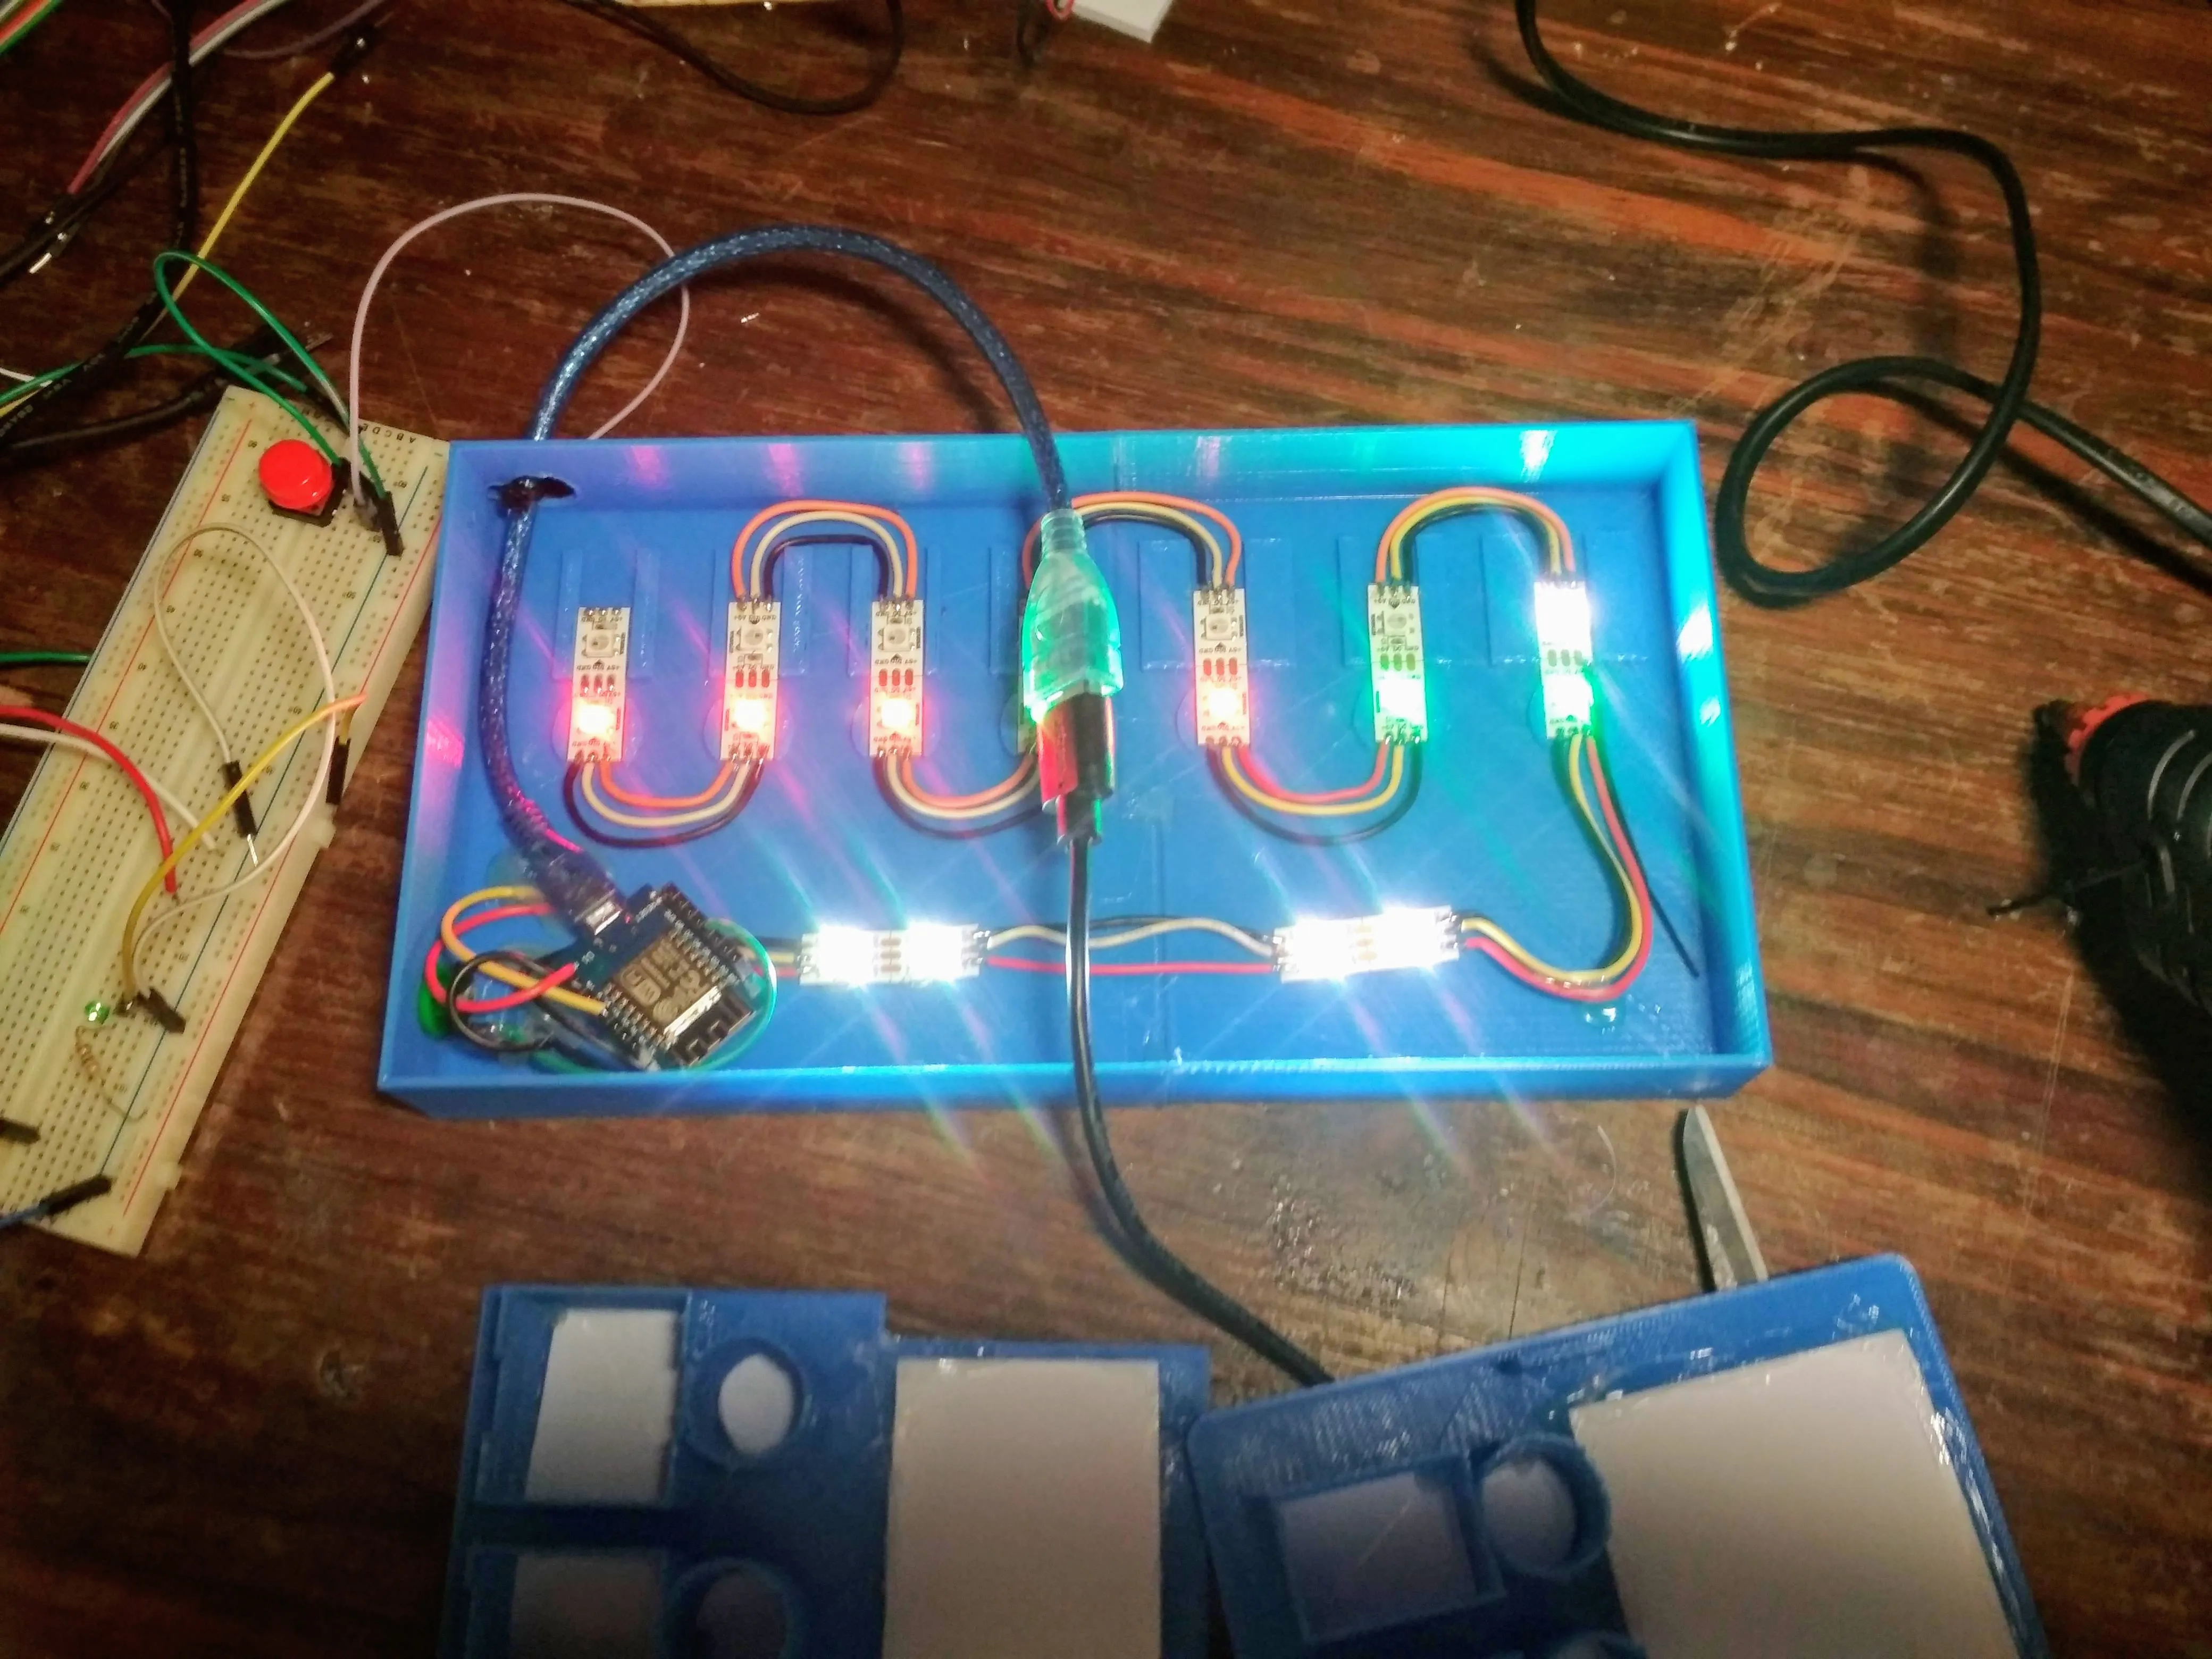
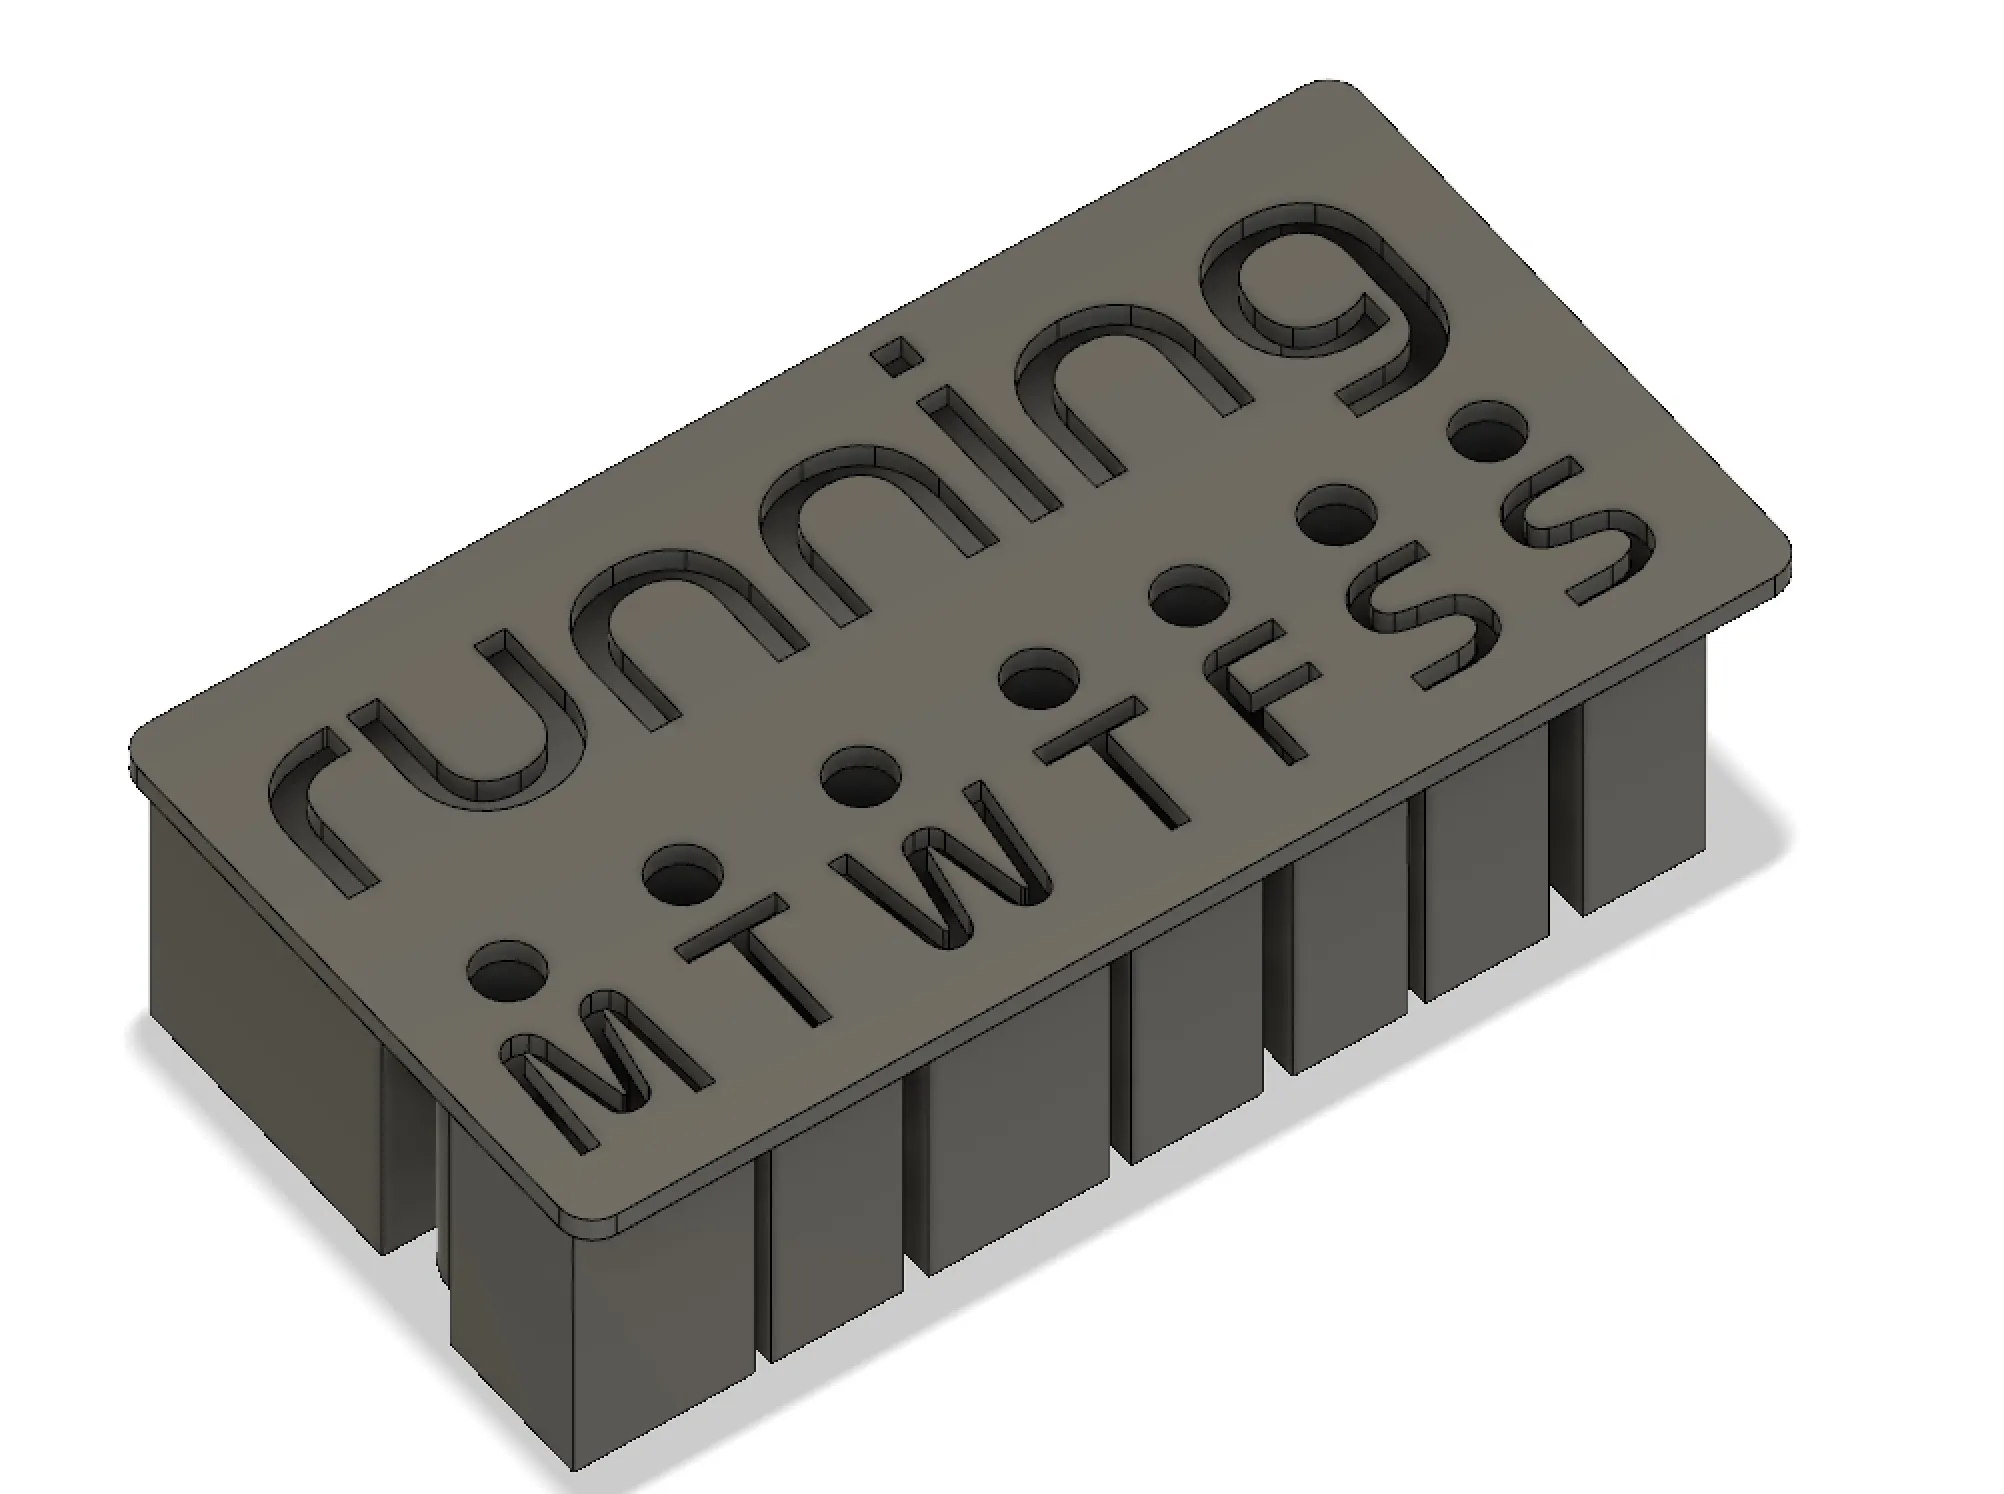
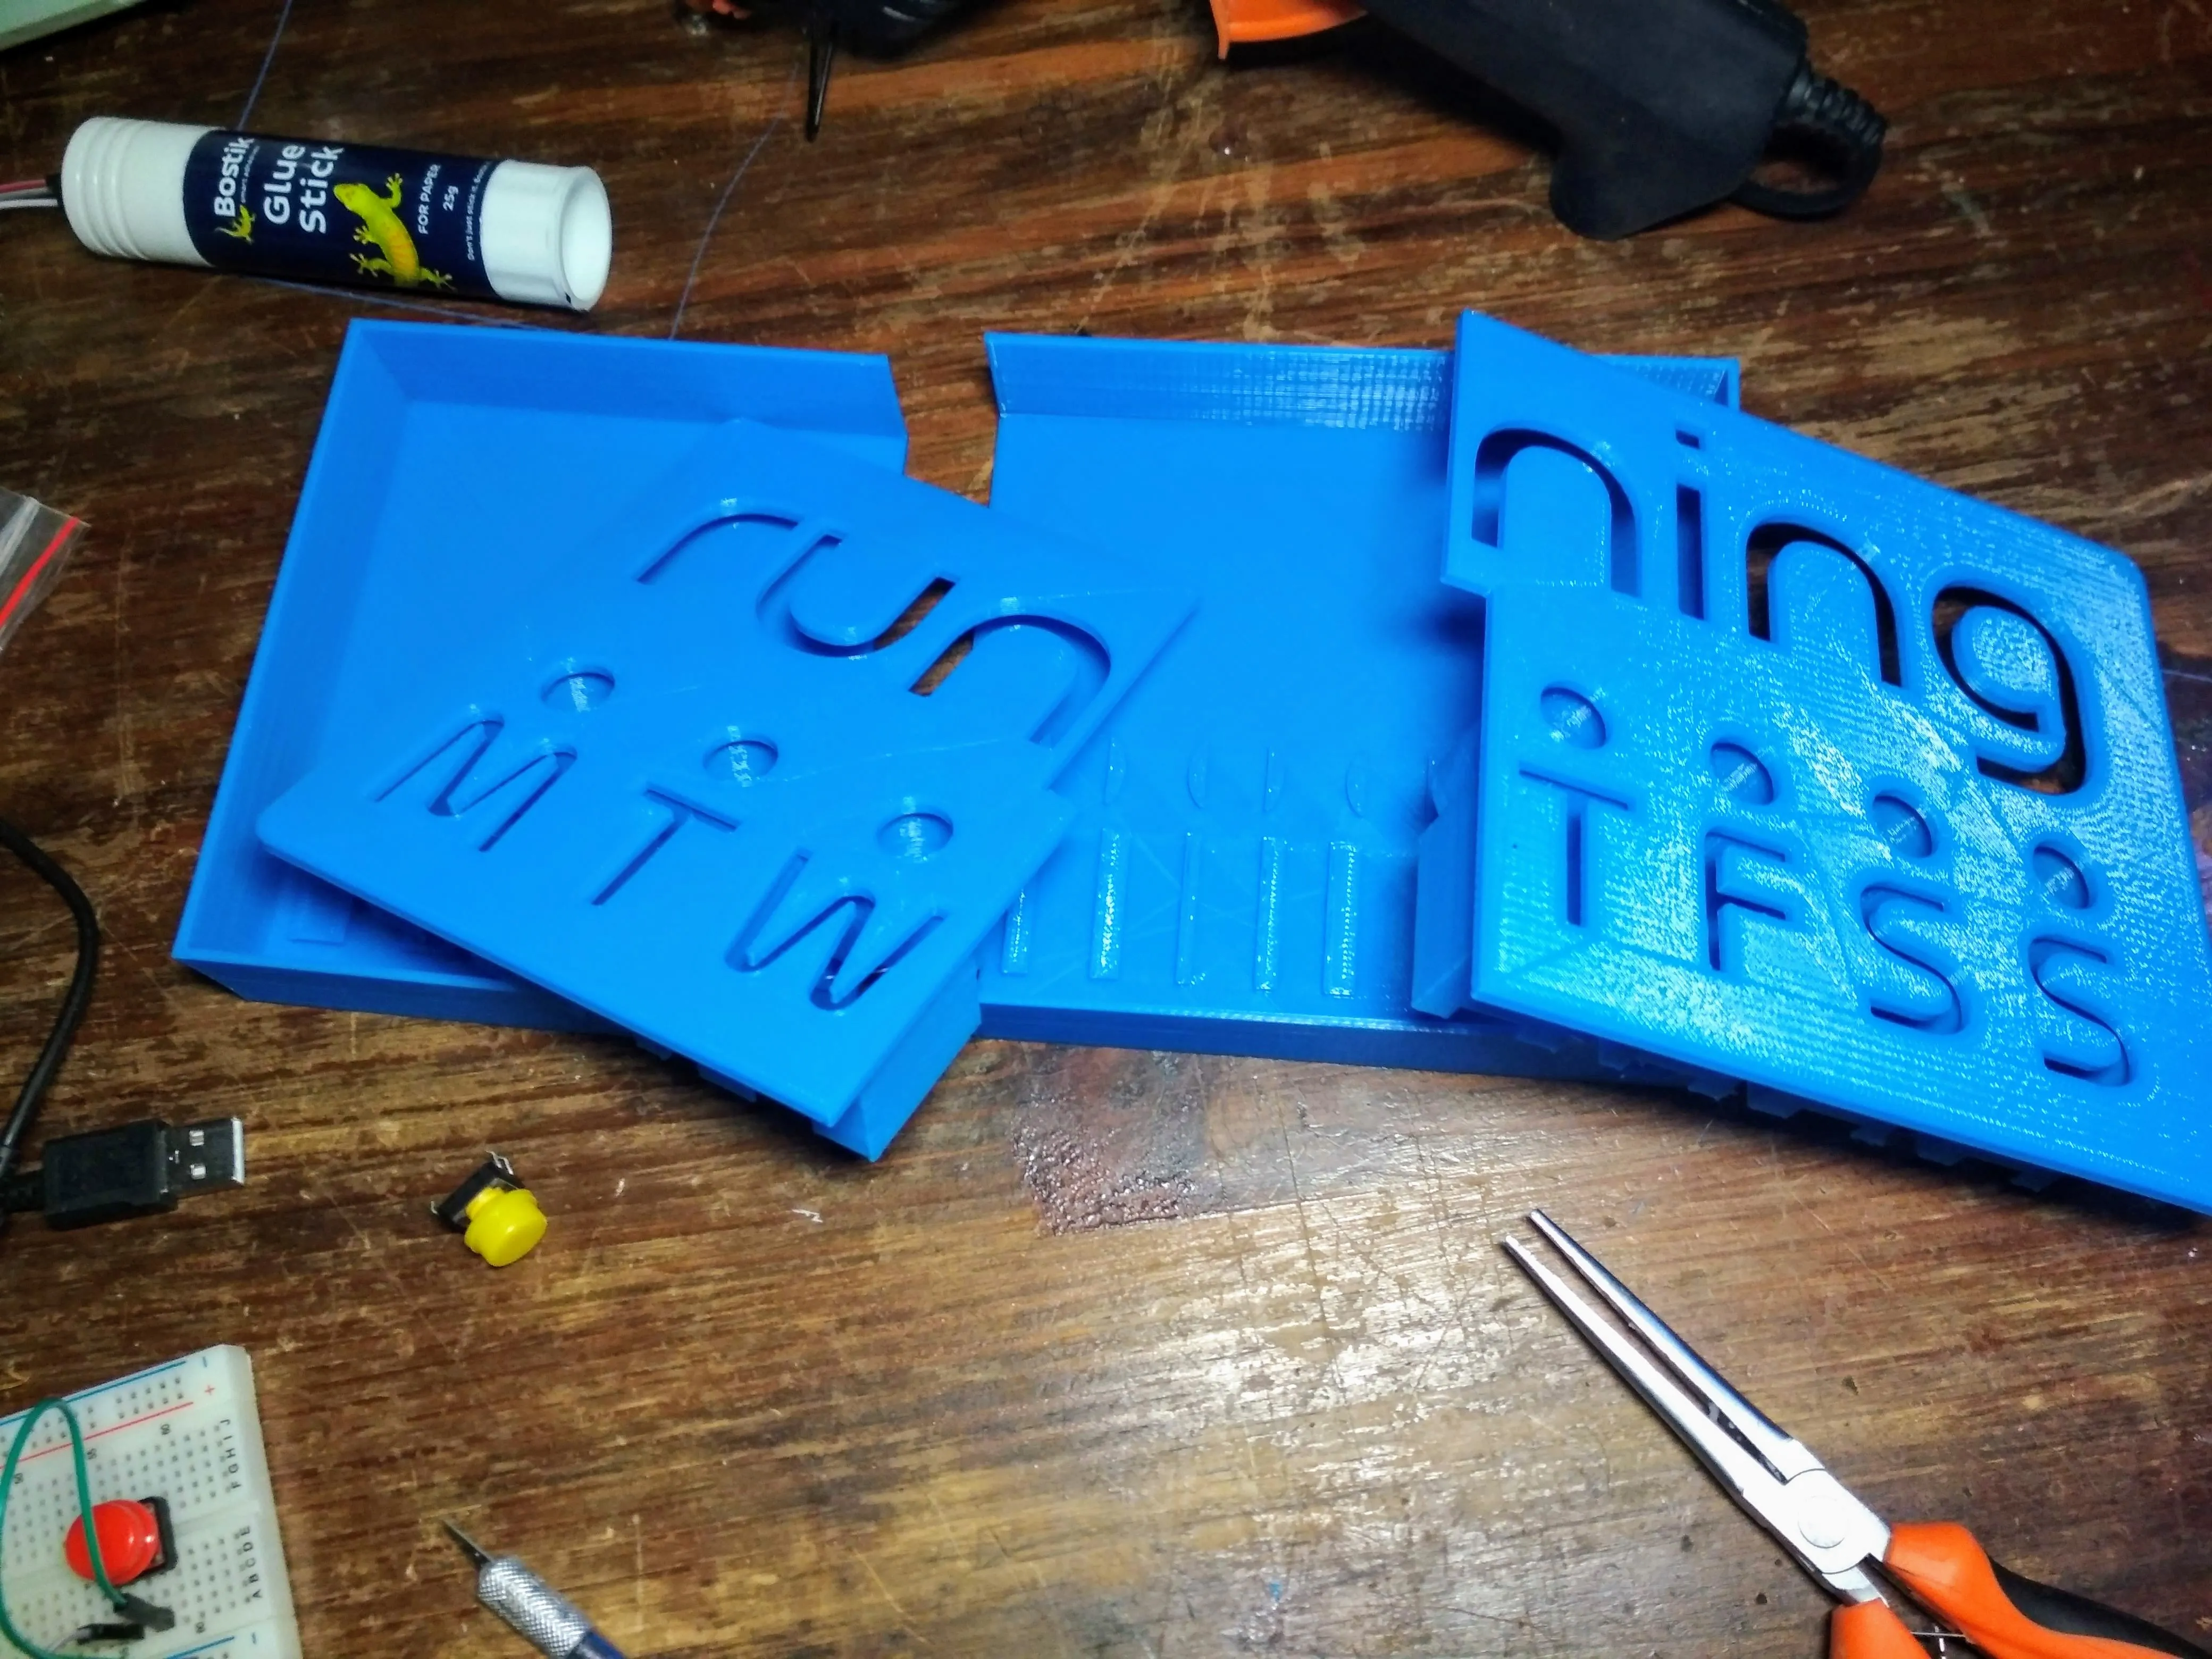
I used a neopixel LED strip which provided me with addressable LEDs so I could change the colour of any LED without wiring each one separately. I also had a D1 mini which is a esp8266 development board to run the LED strip and communicate to my backend. Main reasons for the D1 mini was price (cheap), it has WIFI and includes a usb plug for easy programming. I really enjoy vscode, so I decided to us Platform IO to do the development instead of the arduino IDE. For the 3d print I found a nice stencil font mocked up the design in Inkscape to produce an svg (because I couldn’t get the font to load in fusion 360). Then used Fusion 360 to make the box which needed to isolate light from the other LEDs. I also chopped the box into 4 pieces so I could print it on my small printer.
Software
The aim of the hackathon was to use Azure’s IOT hub (like a mqtt hub with tons of other features) and Azure functions (their serverless offering)
Azure IoT and Serverless
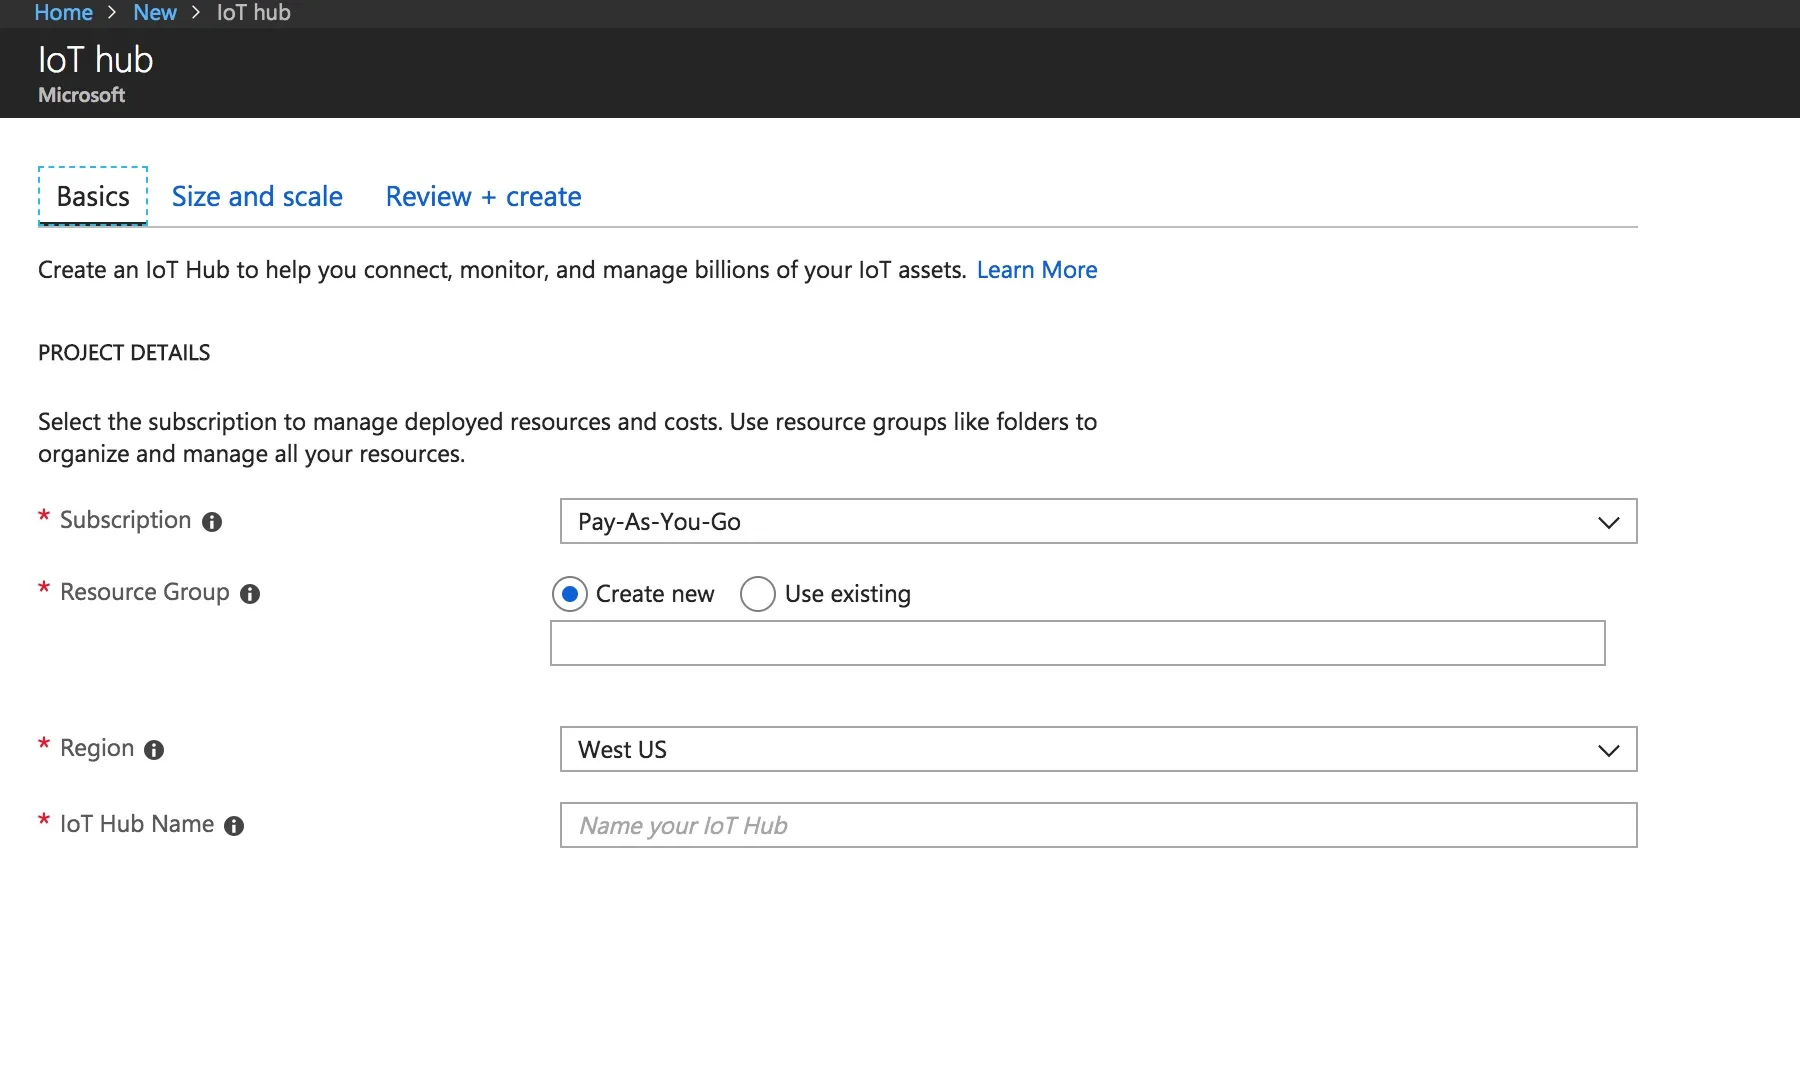
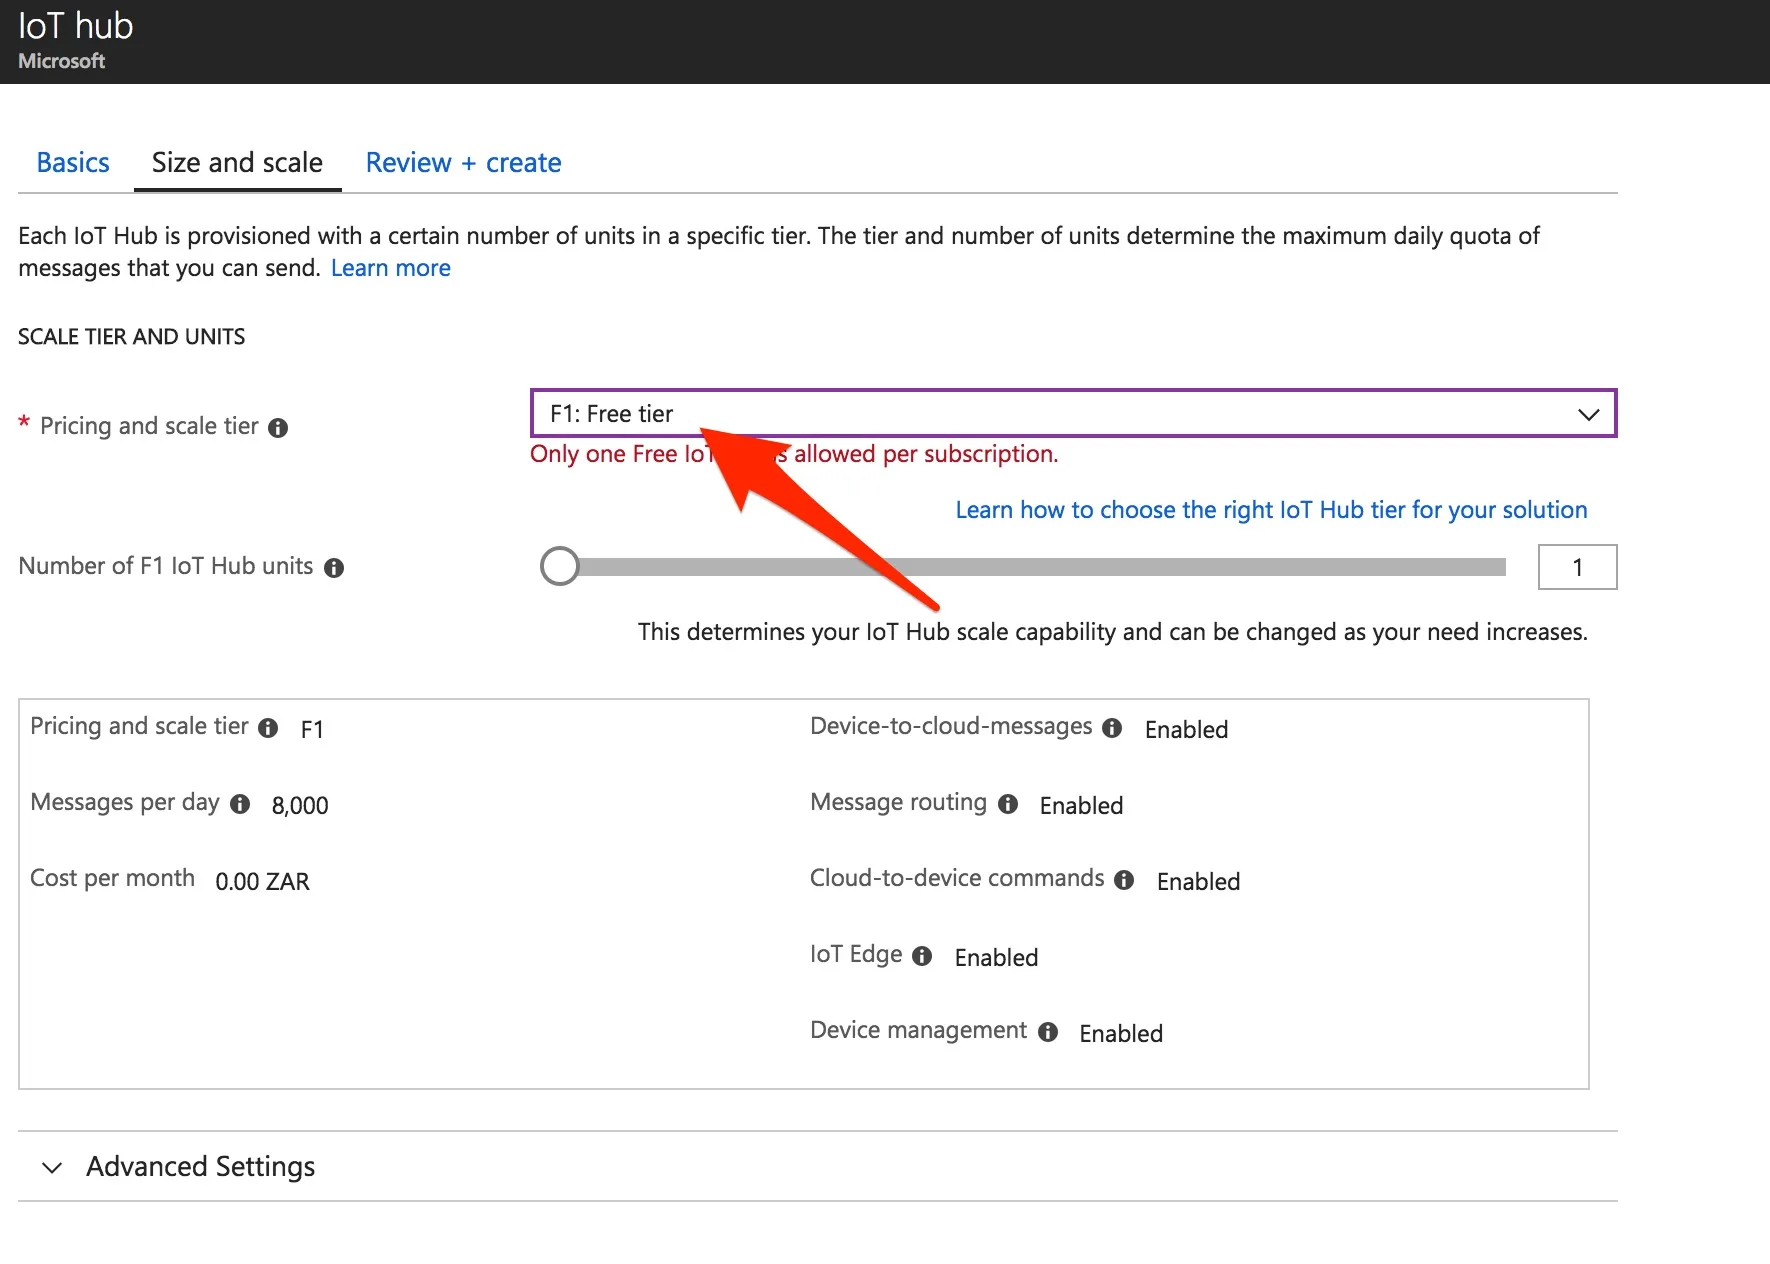
In azure I setup an IoT hub service (made sure it was the free tier).
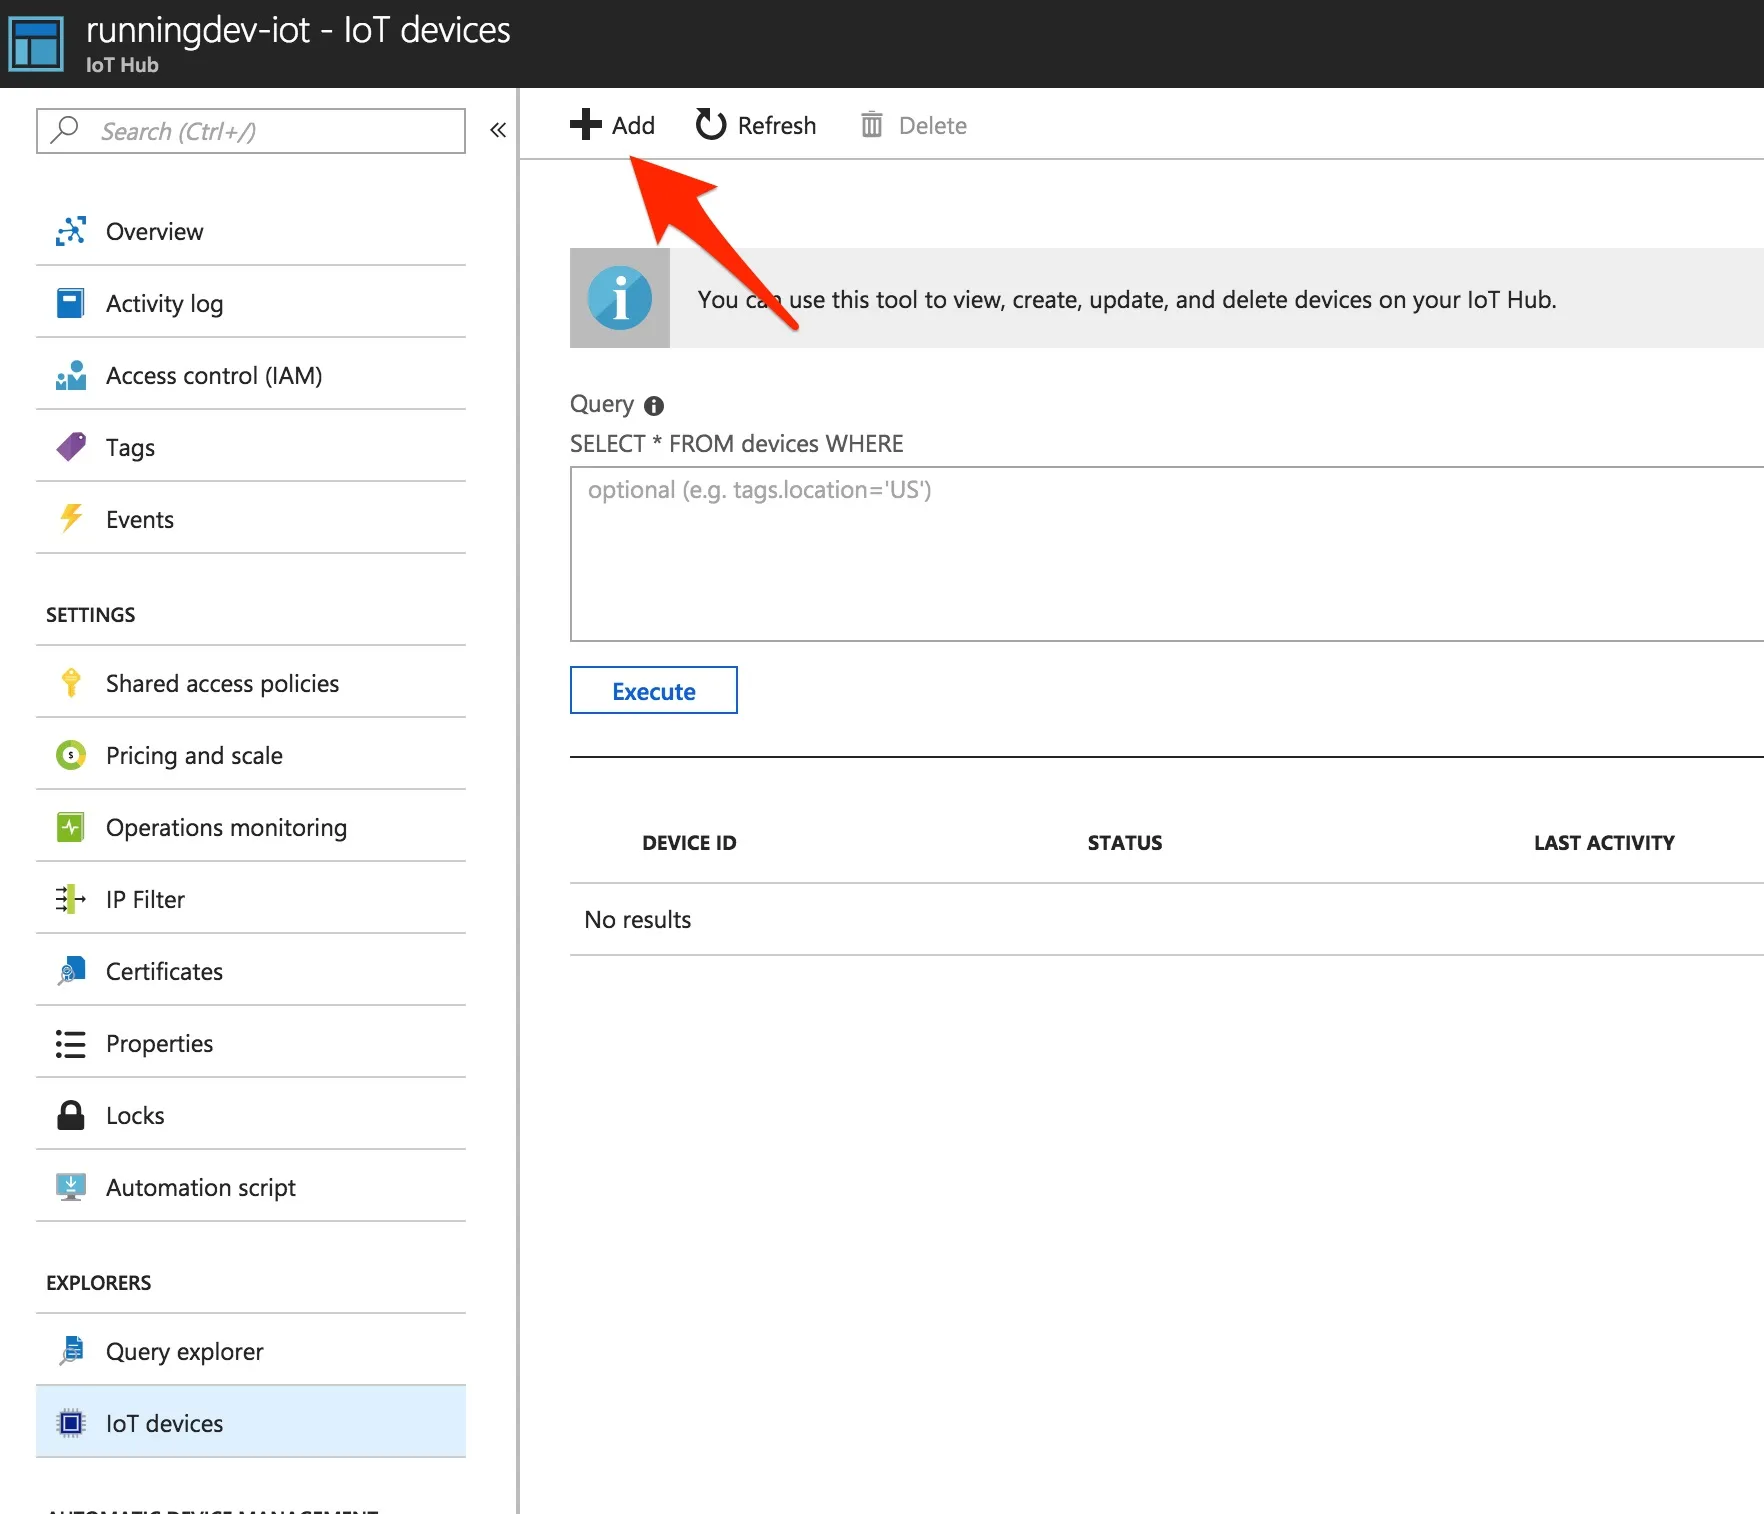
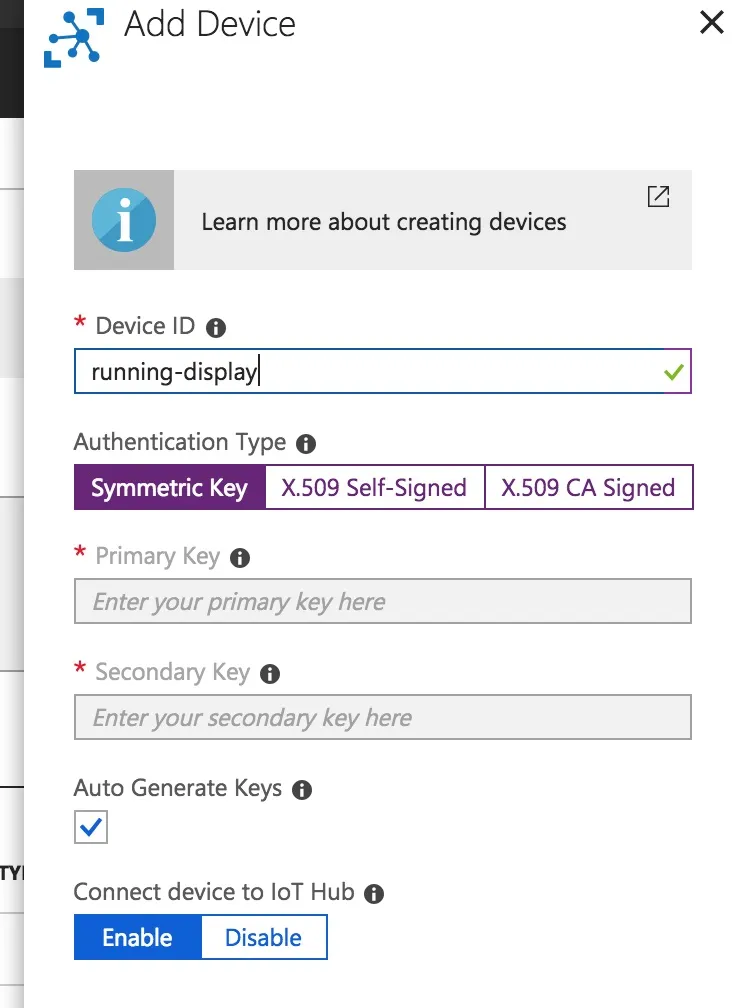
Then I made a thing, which is the iot device you want to talk to.
Then I wanted to see if I could send a message via MQTT because that would be the easiest to interface with the D1 mini. I was hoping I could just send messages via a gui in azure but I couldn’t, so I used this help link to run a simple python script to send a message up to the IOT hub. The only trouble I had was doing the authentication trying to setup a SAS token was hard. I installed the azure cli and then added the iot extension which gives you the option to make a SAS token.
Incase you need it:
az iot hub generate-sas-token -d [Device ID] -n [IoTHub Name]Having the script send messages to the IoT Hub correctly I was on to a good start (now I had a simulated iot device). I still couldn’t really see the messages easily, so I connected it to an azure function that consoled out the message and it worked! I found later that IOT hub explorer helped to see the messages sent from the device.
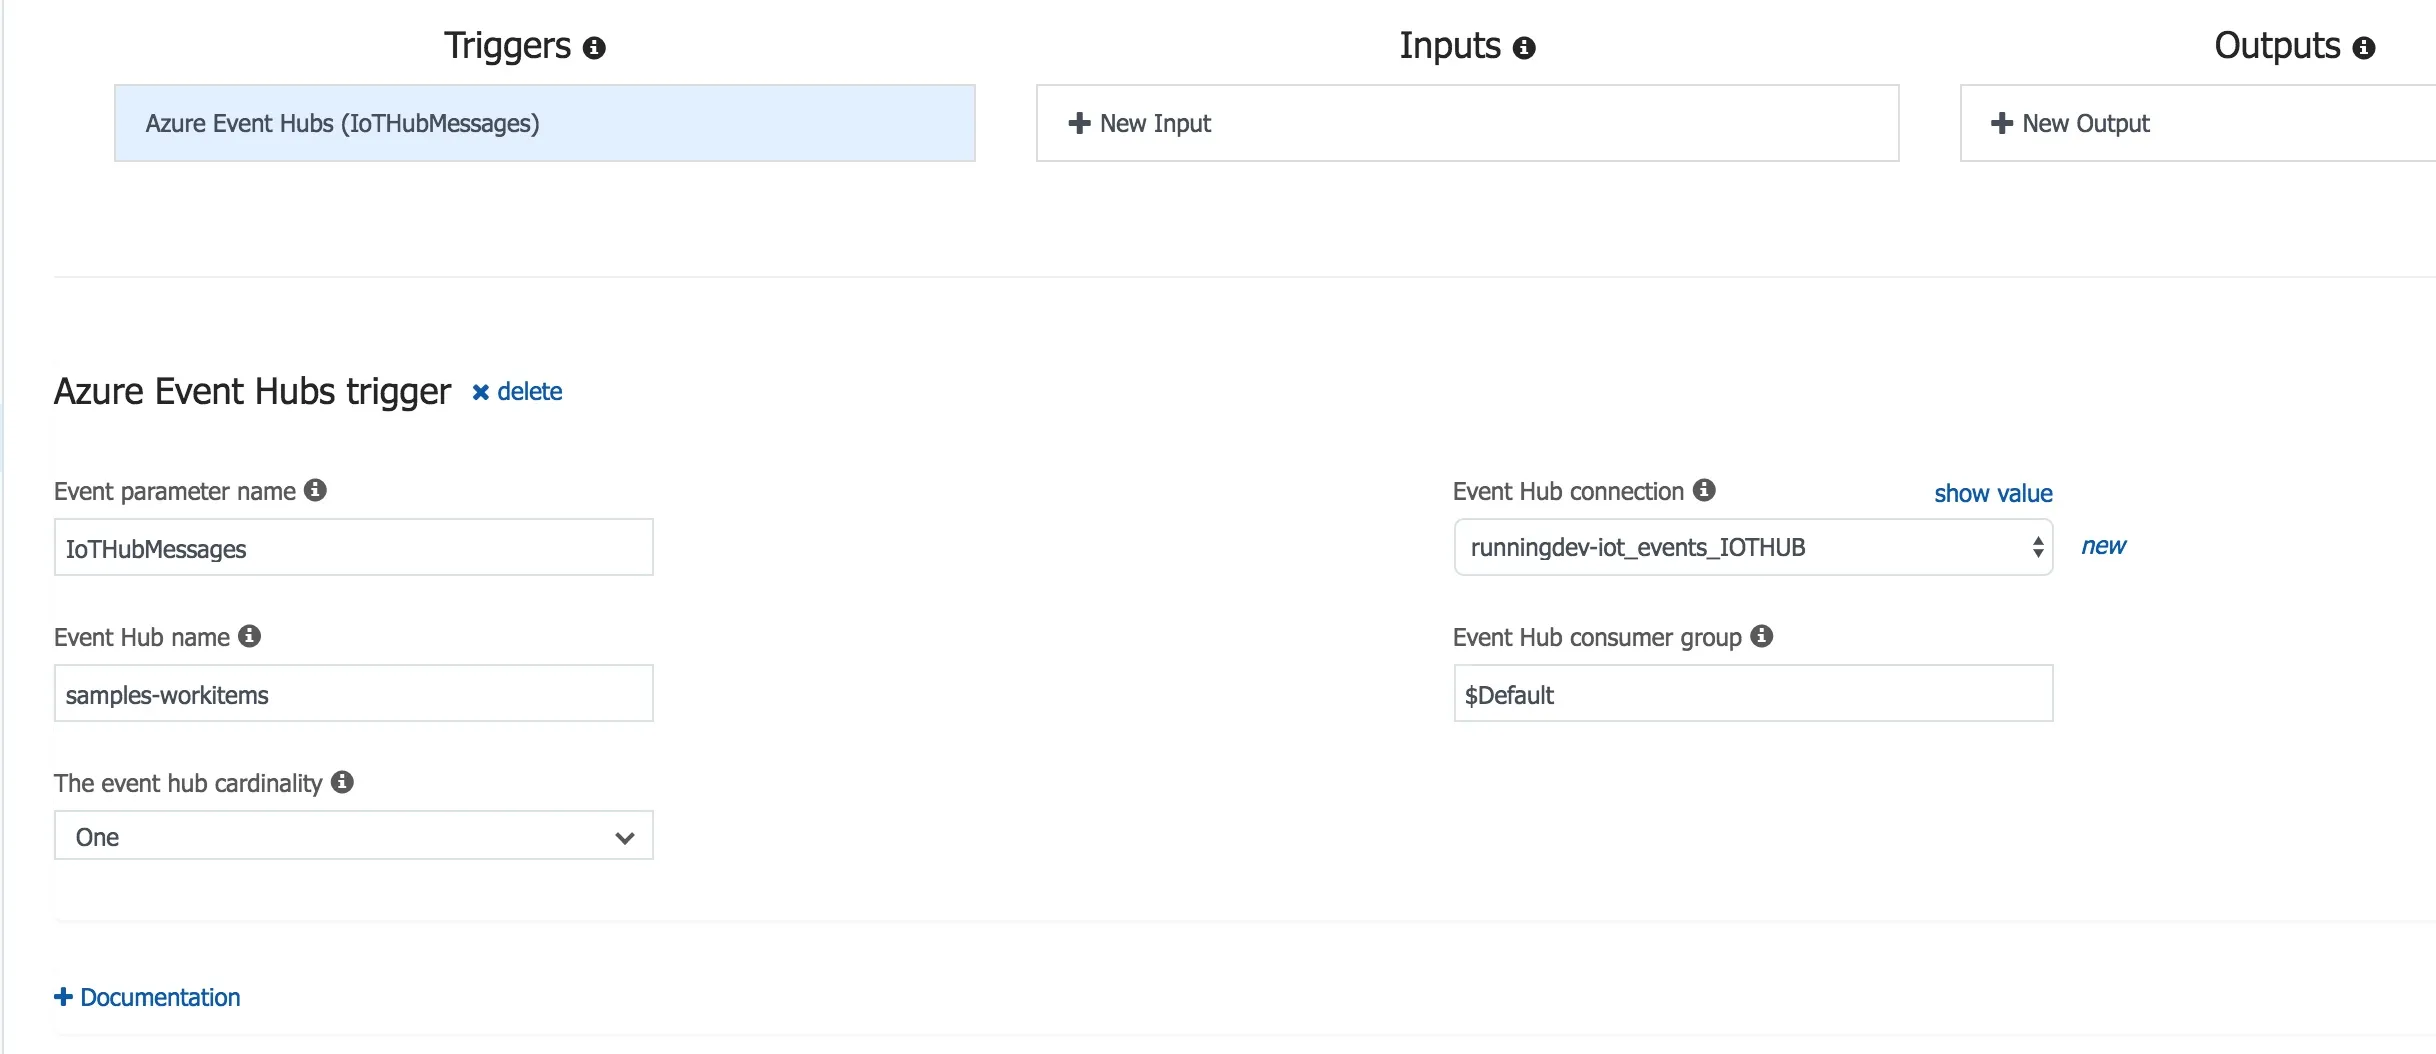
With the azure functions you can make the trigger an input from the IoT Hub (I remember a few steps to make your hub connection show up as an endpoint)
Example of the function listening to the messages:
module.exports = function (context, IoTHubMessage) {
    context.log(`Message: ${JSON.stringify(IoTHubMessage)}`);
}
So sending messages from the display would be fine. I needed this because I wanted to be able to send up a button press to get new data before the hour was up and in future I would like to send status messages of the device for management.
Now I needed to be able to send messages from a serverless function down to the device. I thought you could have a function output a message to the IoT Hub endpoint similar to the trigger. There seems to be ways to do this with Azure’s event grid, but I struggled to get this to work (I may look into this later, but I wanted this to be as simple as possible). So I went with adding the azure-iothub npm package to the function and just sending messages this way.
Gives you some setup code and then you can send a message like this:
client.send(targetDevice, message, (err, res) => {
  if (err) {
      context.log('send error: ' + err.toString());
  } else {
      context.log('send status: ' + res.constructor.name);
  }
});
I want to have a function that pulls down the running data every hour (I think its overkill to do it more than that as I only run about once a day). So I made a serverless function that does an api call to strava, parses the results and transforms it into LED values for my display and sends it to the display mqtt topic.
This was simple enough, but I made it harder on myself because I wanted to use async/await. But the stable version of node in azure functions is not high enough. If you run into this problem, you need to make a new functionApp and choose beta which will give you node 8.11.1 (Just note the drawback is that the iot trigger doesn’t work in the beta).
So this is serverless function setup:
- An http trigger that when hit calls strava api, then sends LED values down to the display
- A timer trigger that runs every hour and calls the http trigger above
- A IoT trigger that listens to the display, if I trigger a button it will call the http trigger above (this is in the event I want my running display to process strava data before the hour timer)
Esp8266
First I wanted to try connect it to wifi so I could have an internet connected device. I used this tutorial code to quickly test if I could run the code and connect to my wifi router (adufruit tutorial).
Then I was able to make the LED strip work using the adafruit neopixel library (sample of code)
My C++ abilities are not great so most of this code includes the above examples and an azure sample for the huzzah board.
From my notes if you can’t find the pins that match the arduino libray for the D1 mini - this shows it
Also had a bit of trouble parsing the multidimensional array of ints coming down (LED values) with ArduinoJson, but I just needed to read a little more of the documentation.
You can check the code
More Pictures
Conclusion
So I’m really happy I made it and I think it is helping me get out more. This week I had my best week in a while (6 days of running). I know it’s not far distances but I am just happy I’m getting out more often.
I will be doing some more improvements as time goes on. I have had it up for 3 weeks and these are ideas I have so far.
- Add an off period at night
- Better clasp to hold the device together and a proper wall mounting system
- Darker plastic so LED light doesn’t bleed or get it laser cut in wood
- More LEDS for the Running text (4 is not enough)
- Send up a health check and notify me if it hasn’t connected in a while (I have had to restart it about once a week as it gets stuck)
- Use the device twin to keep status or log so if it gets powered off I can get the desired state without calling strava api each time it turns on
- Make a version for commits for work and github?